Thursday, 7 January 2021

Reflecting Back On 2020 And What To Expect In 2021

I would like to firstly wish everyone a Happy New Year and hope that 2021 starts to deliver better times ahead. 

To get the disappointing stuff out of the way first, COVID19 had impacted us all in one way or another and as far as most Model Rail Events such as Exhibitions and Conventions, the vast majority were cancelled as part of the overall Government directives to suppress the spread of COVID.

Early Stages of the my COVID19 Project Muttama

2020 In Summary
In early 2020, I have received expressions of interest and had discussions with the various Model Rail Exhibition Coordinators which was to result Narellan to be exhibited at upcoming events that were scheduled throughout the year. I was fortunate enough to get Narellan's first Public showing at Forestville hosted by the North Shore Railway Modellers Association Inc back in March of last year. I would like to thank them again for giving me the opportunity to exhibit Narellan. I have to say looking back it was great to have exhibited Narellan at the Forestville Exhibition as it was only within a week or two from that event the COVID restrictions started to be enforced which has resulted the cancellation of every other planned Model Rail event for 2020, well in the case of the state of NSW. 

Narellan at the 2020 Forestville Exhibition

My Model Rail Club layout also had a few exhibitions scheduled for club layouts to be exhibited in 2020 that was also impacted by the COVID restrictions.

This resulted me in having a revised Plan for 2020 where I decided to start on a new Project which is a HO Scale Layout of Muttama. I started this project back in April 2020. I decided to do Muttama with the view that the down time and the potential lockdowns restricting movement caused by COVID that it would be practical timing to build another exhibition Layout. For the first couple of months into the Muttama Project I was making great progress until June when my Father's battle with Cancer started to take the turn for the worst which took a hit on the progress. Sadly, My Father lost his battle with Cancer in July 2020 and it was not until November 2020 I was able to gradually get back into the routine in Railway modelling which Im glad to say that progress is stating to get back to the pace to where I was when I started this project.

This also impacted the other smaller projects I had intended to do for 2020, but I plan for these smaller projects to get carried over to my 2021 plans.

If there is any silver lining, I did get my model rail supplies for Muttama before most of the materials got sold out as there were many people globally who opted for building model rail projects as their lockdown stay at home activity. Good to the fact my progress was not hindered by the lack or waiting on materials during this time and good to the fact that hobbies like Railway Modelling started to become a popular again as a result in these unprecedented times. 

Locally, from what I have heard from my other Model Rail connections, there are a couple of interesting layouts intended for exhibitions under constructions which is again is going to be good thing to look forward to when the Model Rail exhibitions start up again, whenever that will be.

Plans For 2021
Reflecting back on the previous plans for the year, not all plans get achieved and some instances other projects that are not on the plan get carried out in place. So I will make the following my plan of intention.

Narellan
Get Narellan and locomotive and rolling stock ready for potential 2021 exhibitions. Also make continual enhancements to Narellan where appropriate.

HG Wagon Kit bash for Narellan


Muttama
To complete Muttama and prepare all locomotives and rolling stock to be ready to exhibited by the 3rd Quarter of 2021 (provided Exhibitions commence again). Muttama will be a different layout to Narellan but hopefully will be one that will be appealing to look at.


Tumbarumba
Not that I have abandoned Tumbarumba, but I have no plans to do much to Tumbarumba in 2021. Over the last year I did manage to draw up and 3D Print the Station Sign for Glenroy Station. This is not to say that nothing is going to be done to Tumbarumba, but I may get some line side structures build up so they can just be plonked onto the layout gets constructed at a later time. Basically, there are some other smaller model rail projects I intend to complete first.

3D Printed Sign for Glenroy Station


N Scale Projects
I still intend to do a small Victorian N Scale Layout of Boolarra which I have done most of the 3D Printouts for the line side items. Hopefully time will permit me to do this layout project in 2021.

Other Projects
Plans can vary which may mean they don't happen or they get done or other unannounced projects get carried out instead. This may vary due to circumstances that allow me to do more projects or prevent me from doing doing what I have planned.

Blog Posts Frequency Expectations
As per usual I will keep posting up a blog at least once a month.

Well 2021 is off to a good start which will be reflected in my next Blog post.

A picture of the current progress on Muttama Station Building


Friday, 18 December 2020

HO NSWGR Exhibition Muttama Layout Build October to December 2020 Update

First of all, my apologies for keeping you all out there hanging on for updates on my Muttama Layout Project. This was mainly due to several other priorities outside of my hobby getting in the way of some decent progress over the last few months.

For the first couple of weeks of October I decided to take some long overdue holiday time and spent most of that time catching up with my family down the Far South East Coast of NSW. I also did an additional trip to Ulladulla in November to burn up some more built up Holiday time that has been put on hold.

I was considering packing up a fold up work bench and taking down some model rail items to work on whilst I was down there, but decided in the end not to do so as Im sure I would have left something behind which would have resulted in taking on extra luggage with a defeated purpose. Either way, both breaks were good and has helped clear my mind which has got me rebooted and ready to try and power through the outstanding items that remain to be completed on Muttama.

Furthermore, back in November, as a recommendation from one my model rail friends, I decided to do another Garage clean up but introducing a new work bench that I purchased recently that contains a set of draws to help with a better work place and better storage and access of my tools that I need to use which will result in better productivity. 

I have not worked on the Goods Shed for Muttama for the last few months before October as I was faced with the a few challenges on how to construct the Goods Shed. But finally managed to gradually make small steps at a time to the point of almost completing this build.

The Goods Shed that was once based at Muttama is believed to be only one of two of its type that contains the rounded roof. The other rounded roof variation was based at Brawlin which is the next station north from Muttama.

The design of Muttama Good Shed was very different compared to other Goods Sheds on the NSWGR Network, hence one of the justifications in choosing to model Muttama.

Retro fitting of the 3d Printouts and the styrene platform of Muttama Goods Shed

Work On Muttama Good Shed Previous to October 2020
It would be several months ago that I started to draw up Muttama Goods Shed as I decided it would be a better result to do 3D Printouts on several parts of the Good Shed. This is due to the complexity involved in doing a structure with the rounded roof. In saying that, it was a complex Model to draw up. I decided to go for the scratched build option of the doors and platform as I know within myself that I would deliver a better result in these areas.

For the Roof Section and the ends of the Good Shed were printed in Shapways Black Natural Versatile Plastic. Priming for this particular material needed to be done with an Automotive Primer as it does not soak into the printout compared to the other modelling primers. I did the priming not long after I received the printouts.

For the other printouts, they were printed in Shapeways Smooth Fine Detail Plastic. Priming for these printouts were done with Tamiya Primer.

Below are the progressive pictures of the work that was done 


Getting Back to Work on Muttama Goods Shed
The doors for this type of Goods Shed seem to have been hinged and not sliding doors that were typically used in most Goods Shed on the NSWGR Network. This could have been a reason that this type of design was not rolled out in greater numbers as the hinged doors have demonstrated to me clearly how impractical they were just from this model build. The construction of the doors ended up to become a not so easy task. But persistence payed off in the end.

The Doors that did not work out and ended up becoming scrape styrene

First set of Doors completed
 
The Difficulty in the doors came with the angle of the cut and the width of the doors. I found later on it (as I was doing the last set of doors) it was better to cut the width of the doors slightly wider, build up the frame work behind the doors and then trim off the excess to get the desired outcome.

Unfortunately, I did not take too many progressive photo shots during this period of time, here is what was done over the month of October.


Building up the doors for Muttama

Building and Detailing the Goods Shed Platform and Ramp
From here pictures will best detail the various stages of this build. This platform and ramp up to the platform was scratched built from Evergreen Styrene stuck together using MEK. When the platform was completed, it was primed and coloured up with Tamiya weathering master powders. The 3D Printed items where gluded together with superglue as well as 3D Printed Items to Styrene.


Other than the guttering, weathering and final fixing the Goods Shed to the layout is just about completed. As stated earlier one would think this should have been an easy build, but the reality it was one that has tested my pertinence out the most compared to my other model builds. 

Its That Time Of Year Again
It is almost the end of the year. Well 2020 has been a year of a a lot challenges and I along with may others out there could say that 2020 is a year I think we want to put behind us. I would like to be optimistic that the year 2021 is going to be a year heading in to better circumstances for us all. 

I would like to wish you all a Merry and Safe Christmas and all the best for 2021.


Sunday, 22 November 2020

Muttama In 2020

Here is a bit of a belated post from myself. Long story short I was intending to have the Good Shed for Muttama completed, but other priorities got in the way preventing me from completing it. I am nearing the completion of the Good Shed and hopefully be able to provide a full dedicated post as opposed to a fragmented one in the very near future.

Muttama In Spring 2020
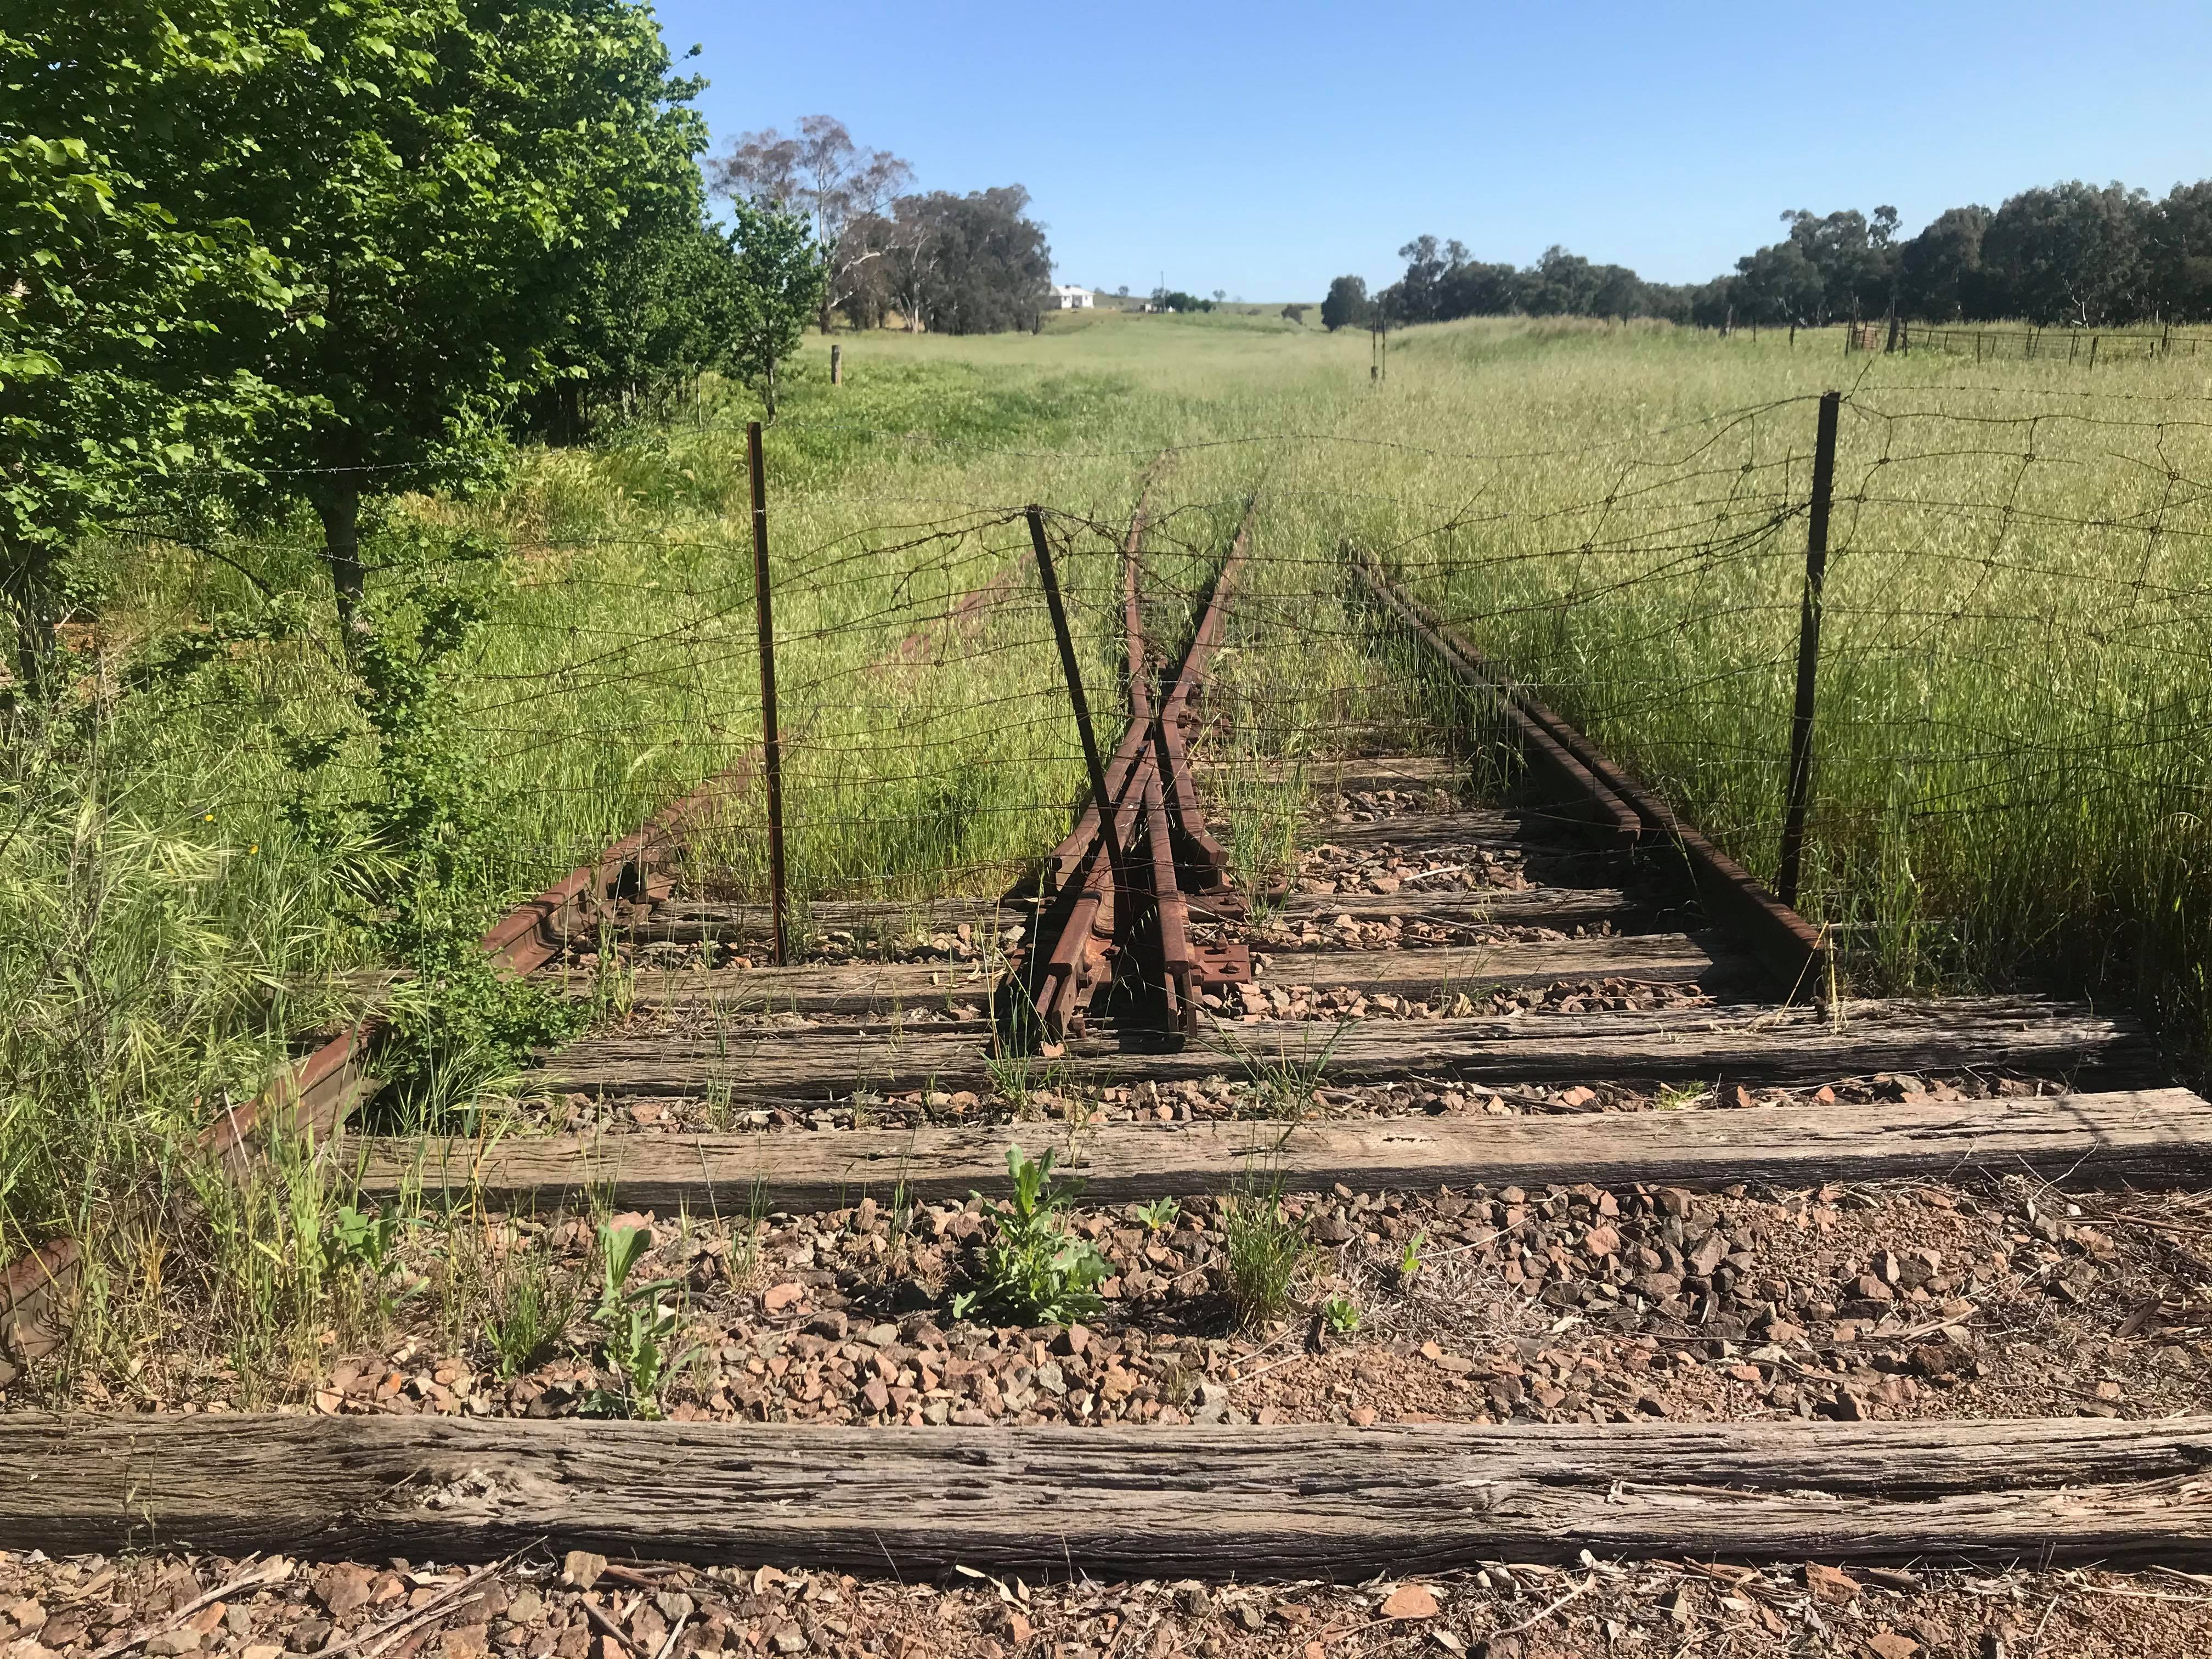
Last month, one of my good friends did a road trip into the Riverina District of NSW and detoured via Muttama. He forwarded me some photos he took of the area and with his permission, I can present you what the landscape of Muttama looks like today. Be warn, you do have to look hard for some of the evidence of what remains of rail corridor at Muttama as most of the infrastructure has been removed long ago and some of it may be hidden in the long grass.  


Looking from the Level crossing towards Cootamundra where Muttama Railway Station was once located at

Looking towards Tumut in the area where the Goods Shed was once based

One of the two Ground Levers for the Siding of the Goods Shed.

Further up on the line is what remains of what seems to be a Cravat. Take note of the hilly landscape in the background.

Comparing The Landscaping


Looking towards the Tumut side of the Level Crossing of the layout compared to the actual location


Looking towards the Cootamundra side of the layout compared to the actual location

Still a fair amount of work to be carried out on Muttama. Hopefully, I can start to get more items completed in the upcoming weeks ahead. Getting straight back into the project now.


Friday, 9 October 2020

HO NSWGR Exhibition Muttama Layout Build September 2020 Update

To summarise Septembers efforts, work was mainly focused on applying the final solution on the road and Level crossing areas on the Layout. I was hoping to have got more items completed, but other work and life priorities again got in the way. However, I managed to get decent amount done in the few nights that I had at my disposal.

Roads and Level Crossing for Muttama
The road that crosses over the rail line through Muttama will be a dirt road. 

I had a couple of choices for the Rail Crossing which was to use Gates which the Gatekeeper would have closed off to road traffic when the Rail Traffic was passing though (hence the existence of the Gatekeepers Cottage), or the Rail Crossing Signs.

After a lot of thinking into the 2 options, I decided to go for the Rail Crossing signs. The reason for this is that I just did not have a lot of information on what type of crossing gates were used at Muttama and that the photos that I do have of Muttama clearly show the Level Crossing signs. However, it is not to say that I may in the future replace the Level Crossing Signs with Gates if I can obtain more information as to what gates were used.

Level Crossing
I decided for the wooden flange ways for the Level Crossing to use styrene. Before super gluing the wooden flange ways so they can be coloured up later on. It is worth pointing out that I tested some locomotives (Steam and Diesel) and other various rolling stock over the Level Crossing to ensure no derailments occur.


I taped up the wooden flanges to allow for the Selleys Spakfilla was applied as shown in the above pictures. Once the Sapkfilla was applied and set, I sanded the Spakfilla to the form that I was looking for. I then coloured up the wood flange ways using the Tamiya Weathering Masters colours. 


Woodlands Scenics Gravel Road applied. I applied pva glue down and got the following effect (which was by pure incident), that somehow created to dirt road wash away effect. However, I decided to smooth it when reapplying the Gravel for the second time round.

For the Road I used Woodlands Scenics Bluff fine Gravel. I was hoping that the bluff colour would provide me close to the dirt road colour and texture that I was looking for. The Woodlands Scenic Gravel comes with 2 x packs which one pack contained the gravel and the other contained the colouring pigment that you apply onto the gravel to get the bluff colour. However, the supplied pigment did not stick and gave up on it in the end. However, the gravel was great and I highly recommended as a road base, but I found the next method delivered the results better than I was originally hoping for.


Roadway gravel up and toned up with soft artist pastels of various colours

I ended up making a trip to a local art supply shop where I purchased a few soft artist pastels. I was able to find a good photo of the dirt road nearby where Muttama railway station is and selected a few colours matching to the various tones that are seen on a dirt road. At first, I used pigments that I shaved off the pastels and powdered them on using a soft bristle paint brush. I later found that scribbling the pastel on the roadway and smudging it with a paint brush was more of an effective method which delivered the end result that I was looking for.

Cattle Stops
Level Crossings mainly in rural NSW locations had Cattle stops at each side of the Level Crossing to prevent Cattle and other live stock making their way into the rail corridor. The HO Scale Cattle Grid by Uneek Models are close to the ones that were used at Muttama.


Cattle Stops painted and put in place onto the layout


Level Crossings Signs
There are a few options for Level Crossings signs on the market which are all very suitable choices. With the limited photographic evidence that I have available, Muttama had the typical Level Crossing signs but with a Stop sign attached which I believe would have been a later addition.

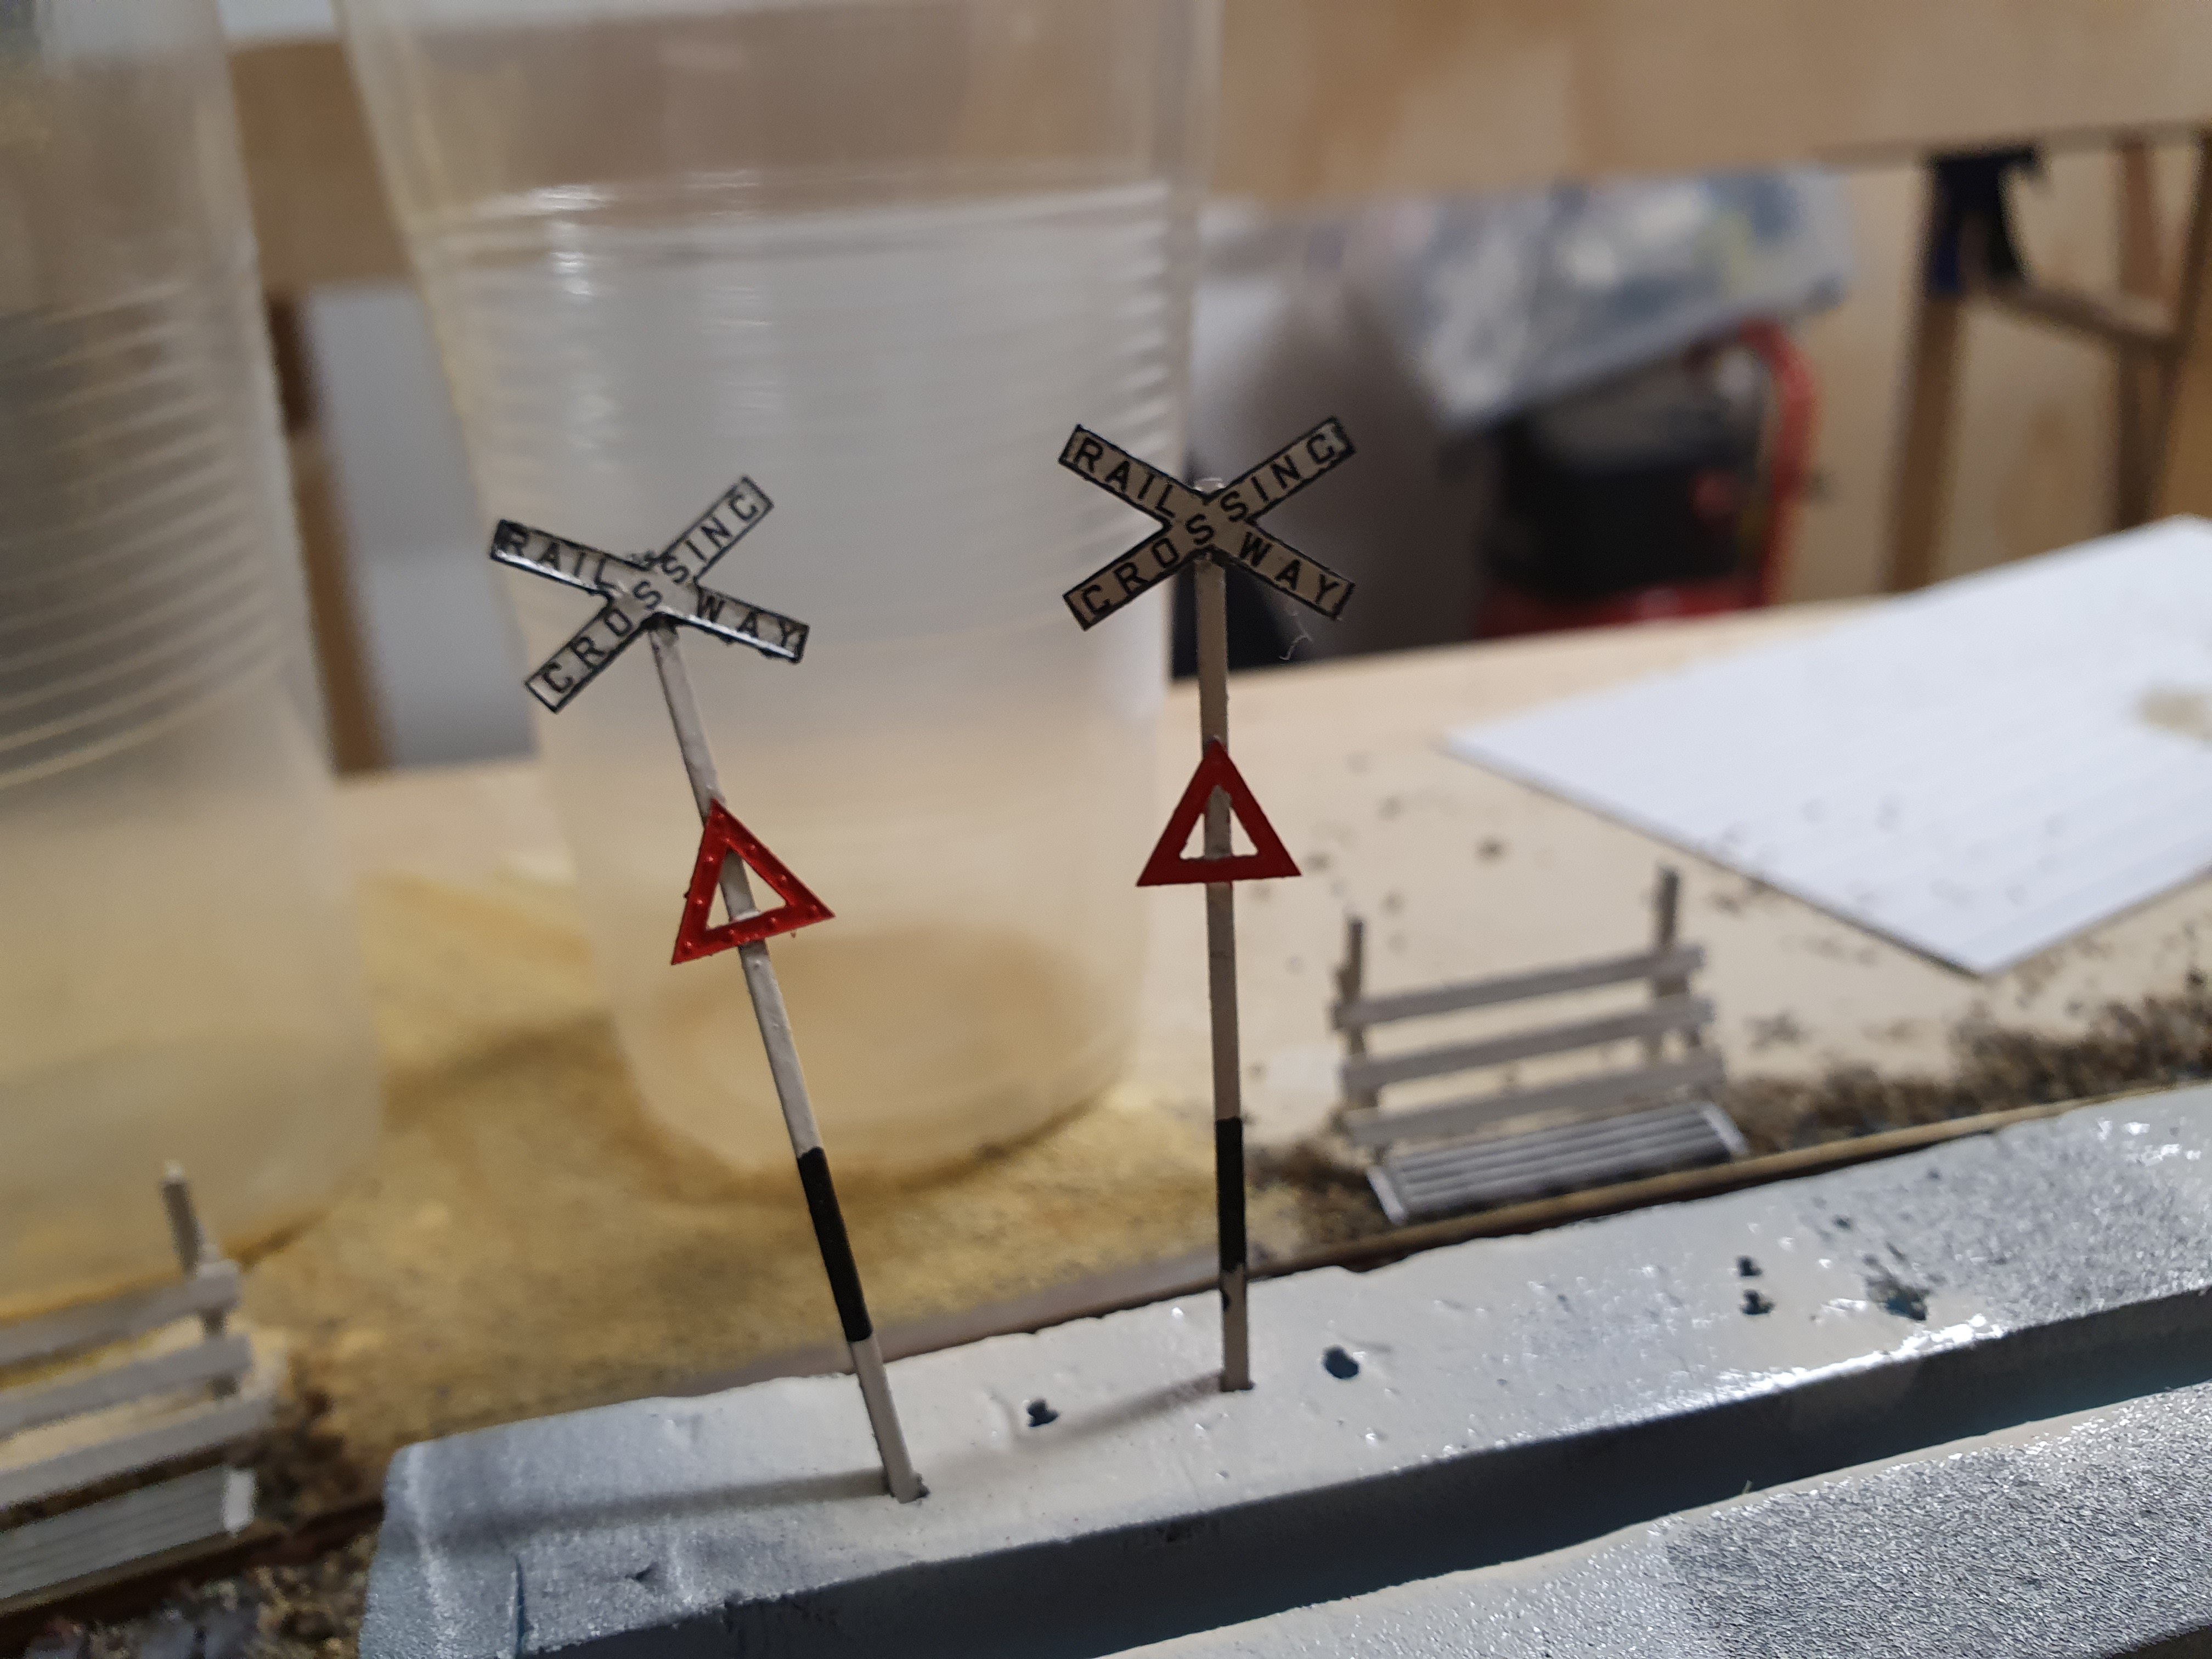
For Level Crossing signs I opted for the Stephen Johnson Models Level Crossing Cast Iron Signs which provides a pair of etched nickel silver signs. The Kit came with a template with measurements where Rail crossing sign and the Triangle needs to be placed. The sign and triangle was soldered onto the supplied rail. I have to say I would recommend this kit for any one who wants to get into soldering etched kits together. For me, this was an easy and quick kit to complete.

I primed the Level Crossing Signs and painted in a Gloss White Paint (as you will need a gloss surface as the decals will adhere better) and applied the other respective colours. 

The decals also needed to be cut to size to fit within the area of the level Crossing Sign. 
Once the decals were applied, I applied Micro Sol to set the decals in place and then apply Dull Coat (I used the tester Dull Coat) to remove the gloss look and to seal in the decals.


Level Crossing signs assembled

Level Crossing Signs painted and Decals cut to size ready to be applied

Level Crossing Signs complete ready to be installed on the Layout

Level Crossing Signs now installed on the layout.


More updates to come in my upcoming October Post.