This post for Glenroy Pc1 Building Kit Bash which will be the final for this series.
This post will cover the minor detailing and painting of Glenroy Station Building to getting ready to be placed on my main home Layout of Tumbarumba when it gets constructed.
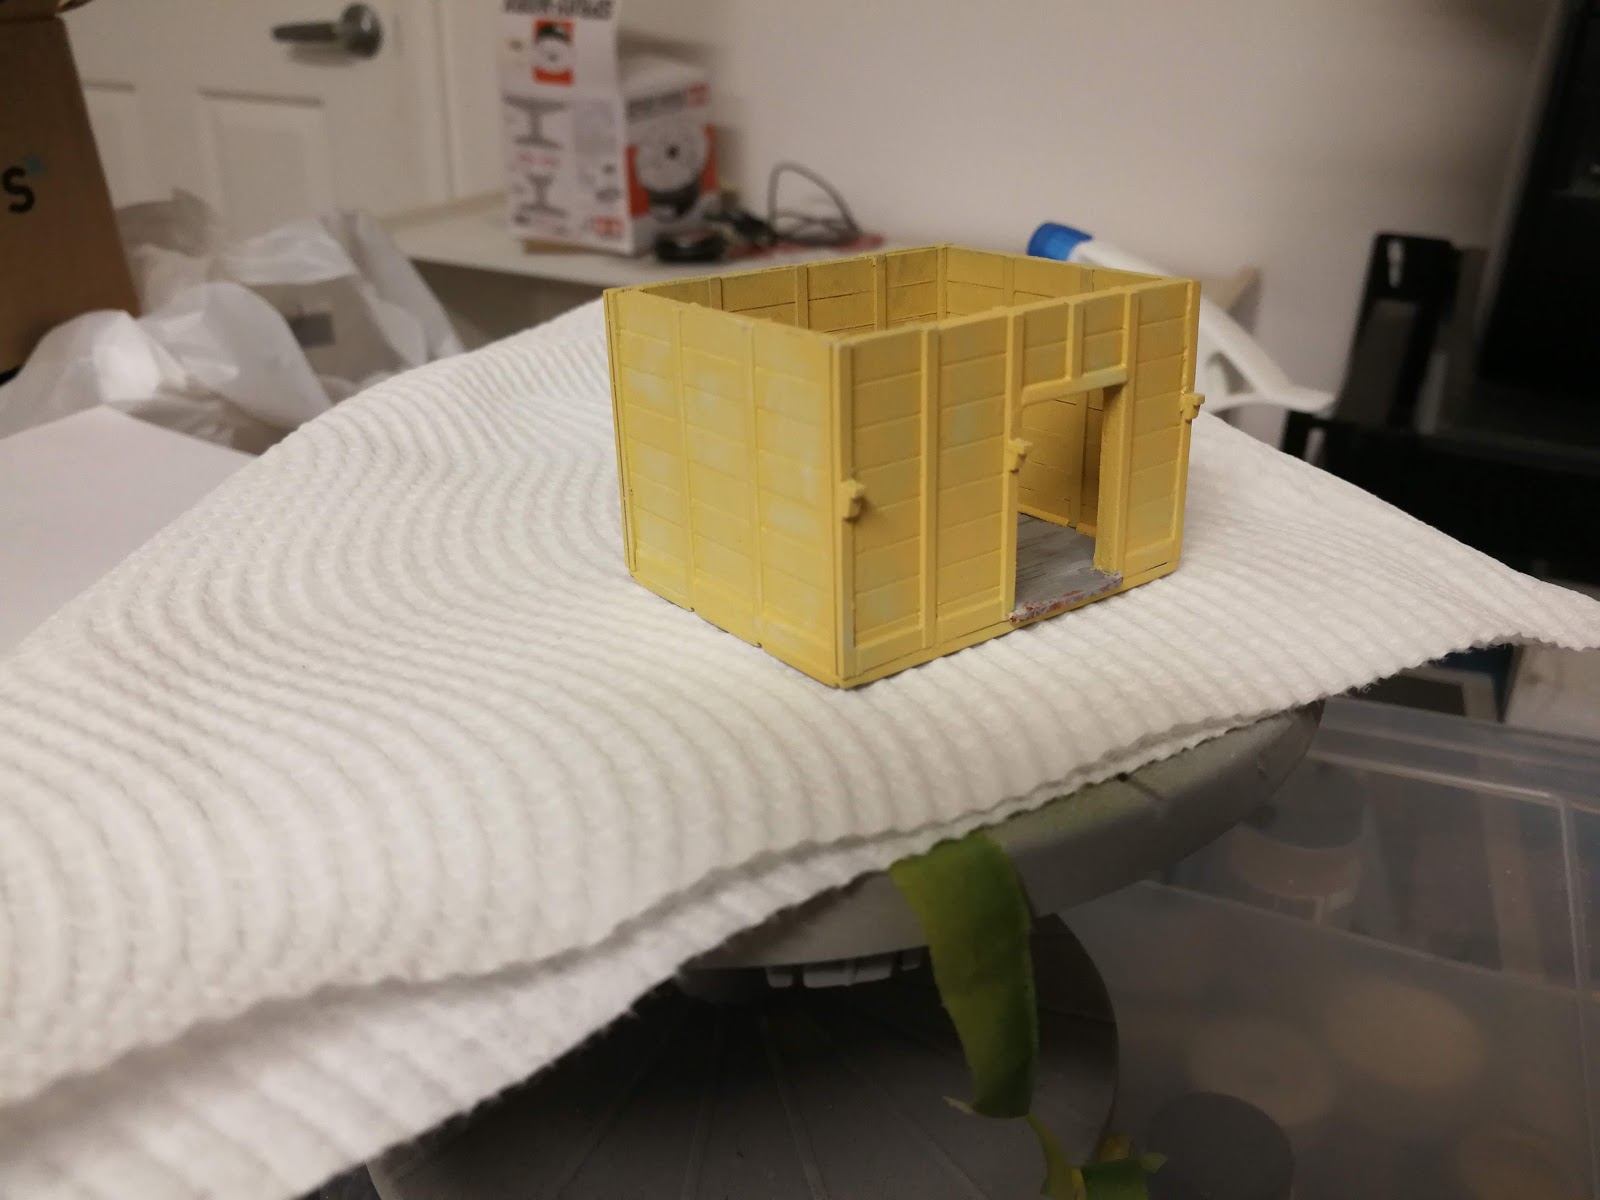
Seating
Unfortunately, I have only been able to locate a few colour photos of Glenroy, none of them showed any internal shots of Glenroy. The Seating at one of the few surviving Pc1 Stations at Bukalong has long since been removed. I decided to refer to the Greg Edwards Data sheet to construct the inside seating for Glenroy.
I have scratched built the seat from styrene.


Guttering and other Roof Detailing


 I have applied the same method above on the roof and main structure of the Pc1, but applied a heavier coat on the Water Tank (which was originally intended for Tumbarumba). Water Tank seem to have hold much of its colour from the pictures I have seen of Glenroy, but seem to have more of a chipped paint look as opposed to the fading paint into the structure to what Glenroy had.
I would have love to painted the full building with a pristine finish to see my handy work, but it would have risked me having to strip back the paint and start again or not get the weathered look that I desired for.
It is also worth mentioning, that by use of a plastic glove, and tumbling inside the model soon after the paint work was applied, gave a nice slightly weathered look inside similar to what you can still see today in some of the Pc1 structures that still exist today. Internally, weathering inside would not be that bad compared to the outside of the structure as the paint work is better protected from the elements.


This post will cover the minor detailing and painting of Glenroy Station Building to getting ready to be placed on my main home Layout of Tumbarumba when it gets constructed.
Seating
Unfortunately, I have only been able to locate a few colour photos of Glenroy, none of them showed any internal shots of Glenroy. The Seating at one of the few surviving Pc1 Stations at Bukalong has long since been removed. I decided to refer to the Greg Edwards Data sheet to construct the inside seating for Glenroy.
I have scratched built the seat from styrene.


Guttering and other Roof Detailing

I have used an U Channel styrene strip for the guttering.


As mention previously on one of my earlier post on the Glenroy Kit bash is that Glenroy station lost roof capping, leaving behind the metal base that the roof capping was placed on. It seems with some of the Pc Buildings (which included Glenroy also included the wooden planks on the edge of the roof. I have included this detailing in this model.

Aluminium corrugated sheeting for detailing the awing and sits on 0.5 mm thick styrene sheeting. Facias have been added, but like the real Glenroy, the side awning facias were missing. Part of giving Glenroy the neglected look.

Here is the risky move, awning support have been added, but unlike what I have done on my Tumbarumba kit bash on the Pc2+ Building, these awning supports will need to bear a bit of load to keep the awning in shape.
Painting Glenroy Pc1
Normally painting is not a fun practice for me, it involves preparation, it makes a mess that takes time to clean up regardless if the paint job is successful or not and if your paint job does not turn out, then it could mean removing the paint job and starting from scratch. But for the case of doing a weathered rustic look to a structure, I personally found it rather satisfying with some great final outcome. Some of this was just experimental which I will explain.


The first prime Job revealed just a few issues where the various parts of the model were joined up as part of the kit bash. When you are using parts of the same colour or white styrene, it can be hard to get a perfect alignment when kit bashing. I was able to correct these misalignments and gaps with Tamiya putty which have corrected this issue.


I have painted the most of the model excluding the roof tiles with a Humbrol light grey as a base coat.


I have here done a test paint with Humbrol Light Bluff (Humbrol Enamel Gloss Colour Number 7) with a thick spray at one end and a light spray at the other end of the gable that I removed from the kit earlier. I did is a lightly soaked paint brush with turps to create the weathered look. As Humbrol Light Bluff is a gloss colour, I used the Testers dull coat to remove the gloss. It looks very close the actual coloured pictures that I have seen of Glenroy Pc1.


I would have love to painted the full building with a pristine finish to see my handy work, but it would have risked me having to strip back the paint and start again or not get the weathered look that I desired for.
It is also worth mentioning, that by use of a plastic glove, and tumbling inside the model soon after the paint work was applied, gave a nice slightly weathered look inside similar to what you can still see today in some of the Pc1 structures that still exist today. Internally, weathering inside would not be that bad compared to the outside of the structure as the paint work is better protected from the elements.


Tiled Roof section was painted using Humbrol Ocean Grey as the base coat and lightly sprayed Model Masters Dark Tan for the top coat.

I started the weathering on some parts of the model and a little with the flooring and then Dull Coated the main building.


Using the dry brush weathering method, I dried brush on some Model Masters Dark Ghost Grey and dried brush on some Humbrol Flat white on the strip where the roof capping would have been placed.
I messed up the weathering job on the corrugated metal roofing on the awning. I later on decided to repaint the awning cover and provided a light weathered rust using Model Masters Rust colour via the dry brush method.

The finished weathering job on the Water Tank. It is worth mentioning that I did use the turps brush method to age the light bluff colour paint job when I applied the Model Masters Dark Ghost Grey paint for the exposed concreat weathering.
Final Assembly of Glenroy Pc1
Now on the final run to complete this Kit bash project to the point that it can be placed on the layout when that time arrives.

My scratched built seating was painted, dull coated and put in to place by using Krystal Klear to attach it to the model.


I used Krystal Klear again to stick the roof onto the the main body. Hopefully it will remain in place. I have not used Krystal Clear on the awing supports to the corbels of the building just in case the roof does not stick on. Once Im satisfied it is firmly stuck, will Krystal Clear the awning supports onto the model. It is completed for now. I will need to add in a little bit of plumbing work from the guttering the water tank, but I do not intend to do that until this model is permanently fixed in place on the layout.
Final Run Down On My Glenroy Pc1 Kit Bash Experience
This kit bash project has gone extremely well, where I did come across some unexpected but pleasant results.
The awing supports that I did for this building I was expecting to break off every time I handled the roof section. Fortunately, this never occurred.
About 30 minutes after Dull coating the roof section of Glenroy Pc1, I noticed that there was a bit of gloss showing on the gables each side of the roof section. Soon after noticing this, I decided to spray that area again. Not sure at the time if that was not the best practice, but the following day I noticed that the paint work on the facias started to have that blistered look. If this was a pristine paint job, I would have to have stripped the paint back from that area and reapply the primer and paint again.
In this case, it gave a good realistic weathered paint look. Im not sure if it me reapplying the dull coat too soon or other factors such as a thing coat of paint or blistering caused by the styrene itself or just a once off unique event that just happened in the right circumstances. I will have to one day try to repeat this and see if I can successfully replicate this blistering effect and share the method on how it is done.

The unexpected blistering effect seen on the facias.
For the learnings, next time I will not do the internal roof cavity detailing as it cannot be viewed, painting is a messy and not accurate when painting the rafters.
There were some items that could have been done better, but fortunately, those imperfections can not be seen external to this model.
In all, cutting up the two Rail Central kits to get the results that I have ended up with to me was well worth it.
The Closing Note
Outside of the topic of Glenroy Pc1 Kit Bash, I have been working the baseboards and building the line side structures for my new Exhibition Layout. These are well on their way where progress is moving much quicker than expected. Hopefully I can continue this run soon as I expect to finally finish my tasks for my Clubs Wingello layout in the next couple of weeks. Hopefully from there, full focus will be on getting my new Exhibition Layout to the point of operational completion soon.
Next post will cover the baseboards for the Exhibition Layout.