Sydney had to endure a second lockdown due to COVID which has resulted in my busy social schedule for July and August being cancelled out. Thankfully, I have enough materials and pending model rail projects to keep me going as long as I do not run out of paint.
For now, all focus will be mainly on Muttama and Narellan. Narellan more for rolling stock and Muttama for the completion of this Layout Project.
On the positive, unlike June's progress which was slow. July has allowed for a lot of good progress for minor line side items to be constructed and completed which has made some big steps forward in completing Muttama.

The models that were completed in July
The Gatekeepers Outhouse
One of the most important facilities for any home to function, but back in the day, the Outhouse was the prime solution. Im only just old enough to have seen the various types of Out Houses which most of them that were still in existence in the 1980's have since long disappeared.
On the plans that I got for the Gatekeepers cottage for Muttama it included the plan for the Outhouse.
Building The Gatekeepers Outhouse
As the pictures will describe most of steps that took to build the Outhouse. I should mention that I constructed this model to only present details that is visible from the various viewing points of the layout as it is no point detailing the areas inside the model that are not visible. For this build, I only detailed the internal back wall and the and the right wall on the inside facing the model from the front. I also felt compelled to model the thunder box.
As the pictures will describe most of steps that took to build the Outhouse. I should mention that I constructed this model to only present details that is visible from the various viewing points of the layout as it is no point detailing the areas inside the model that are not visible. For this build, I only detailed the internal back wall and the and the right wall on the inside facing the model from the front. I also felt compelled to model the thunder box.

Evergreen 1.5mm clap board siding cut to size.

First corner half of the Outhouse built.

Seating area of the thunder box being constructed. X marks the spot for the centre for the opening which will become a 4mm hole. It should be noted that I started with a 0.5mm Drill via use of a pinvise. As the 4mm drill was too big to fit in the pinvise, I carefully drilled the 4mm hole by hand.


Thunder Box is now looking cosy. The styrene that goes from the seat to the floor is Evergreen 1.5mm styrene 0.5 thick V Grove siding. You should just make out that I have a couple of wedges along the side if the entry which will be used to mount the door.


Painted the Outhouse with SMS Paints German Cream, Dark brown and the floor with Deck Tan. I thought painting the Outhouse in a different colour would be appropriate in order not to make it boring colour wise.


Both halves of the building have been glued together. Just the roof to be built. But enjoy the view of the details before the roof gets fitted on for good.

Roof constructed and almost ready to be fitted on the Outhouse. Just need a little more detailing added to it.

Fencing for the outhouse (as shown on the plans) have been constructed out of styrene. Made sure there was a of length on the fence posts so I can properly anchor in the fence.


Fence was primed and detailed with Tamiya dry brushing weathering powders. It should be noted that I used a serrated hobby knife blade on the styrene to get the graining look as the same as timber before priming and weathering.

Roof detailing completed and now fixed to the outhouse with superglue. Model ready to be fixed the layout when the time is right to do so.
NSWGR Portable Rest Cabin Standard "A"
The Portable Rest Cabin were based mainly at Terminus stations of a Branch Lines. They would have also been found in major rural Rail depots or in random locations such as in this case on the line side of Muttama. Rest Cabin as the name applies, was mainly for Locomotive Crew to rest between shifts, but could have been used for other purposes. Unfortunately, I have found no real detail on what other applications it could have been used for and why would there be one placed in Muttama. In a Branch Line Terminus setting such as Tumbarumba, the Rest Cabin would have also surrounded by other structures such as Kitchen, Lavatory and Out House facilities. There was also a NSWGR Standard Portable Rest Cabin Standard "B" which was the structure that would have the Kitchen, Lavatory, Bedroom and even a Shower included under the one roof.
Muttama Portable Rest Cabin
In one of the Photos of Muttama which can be found on the NSWRailnet site (Link https://nswrail.net/locations/show.php?name=NSW:Muttama) which presents a Black and White picture of the Tumut end from Muttama station, shows to the left a picture of a Cabin that resembles a Portable Rest Cabin. At this point of time, I am unable to determine the actual reason for the placement of this Rest Cabin based at Muttama, but my assumption is either for storage or a Rest Cabin for the Fettler's.
Building Muttama's Rest Cabin
I found this build to be an easy and quick build. This is the first time that I have made a model from the Novelty siding, which has a very close similarity to the timber sideboards that were used on many NSWGR line side structures. Following are the pictorial steps that I carried out to build the Rest Cabin.

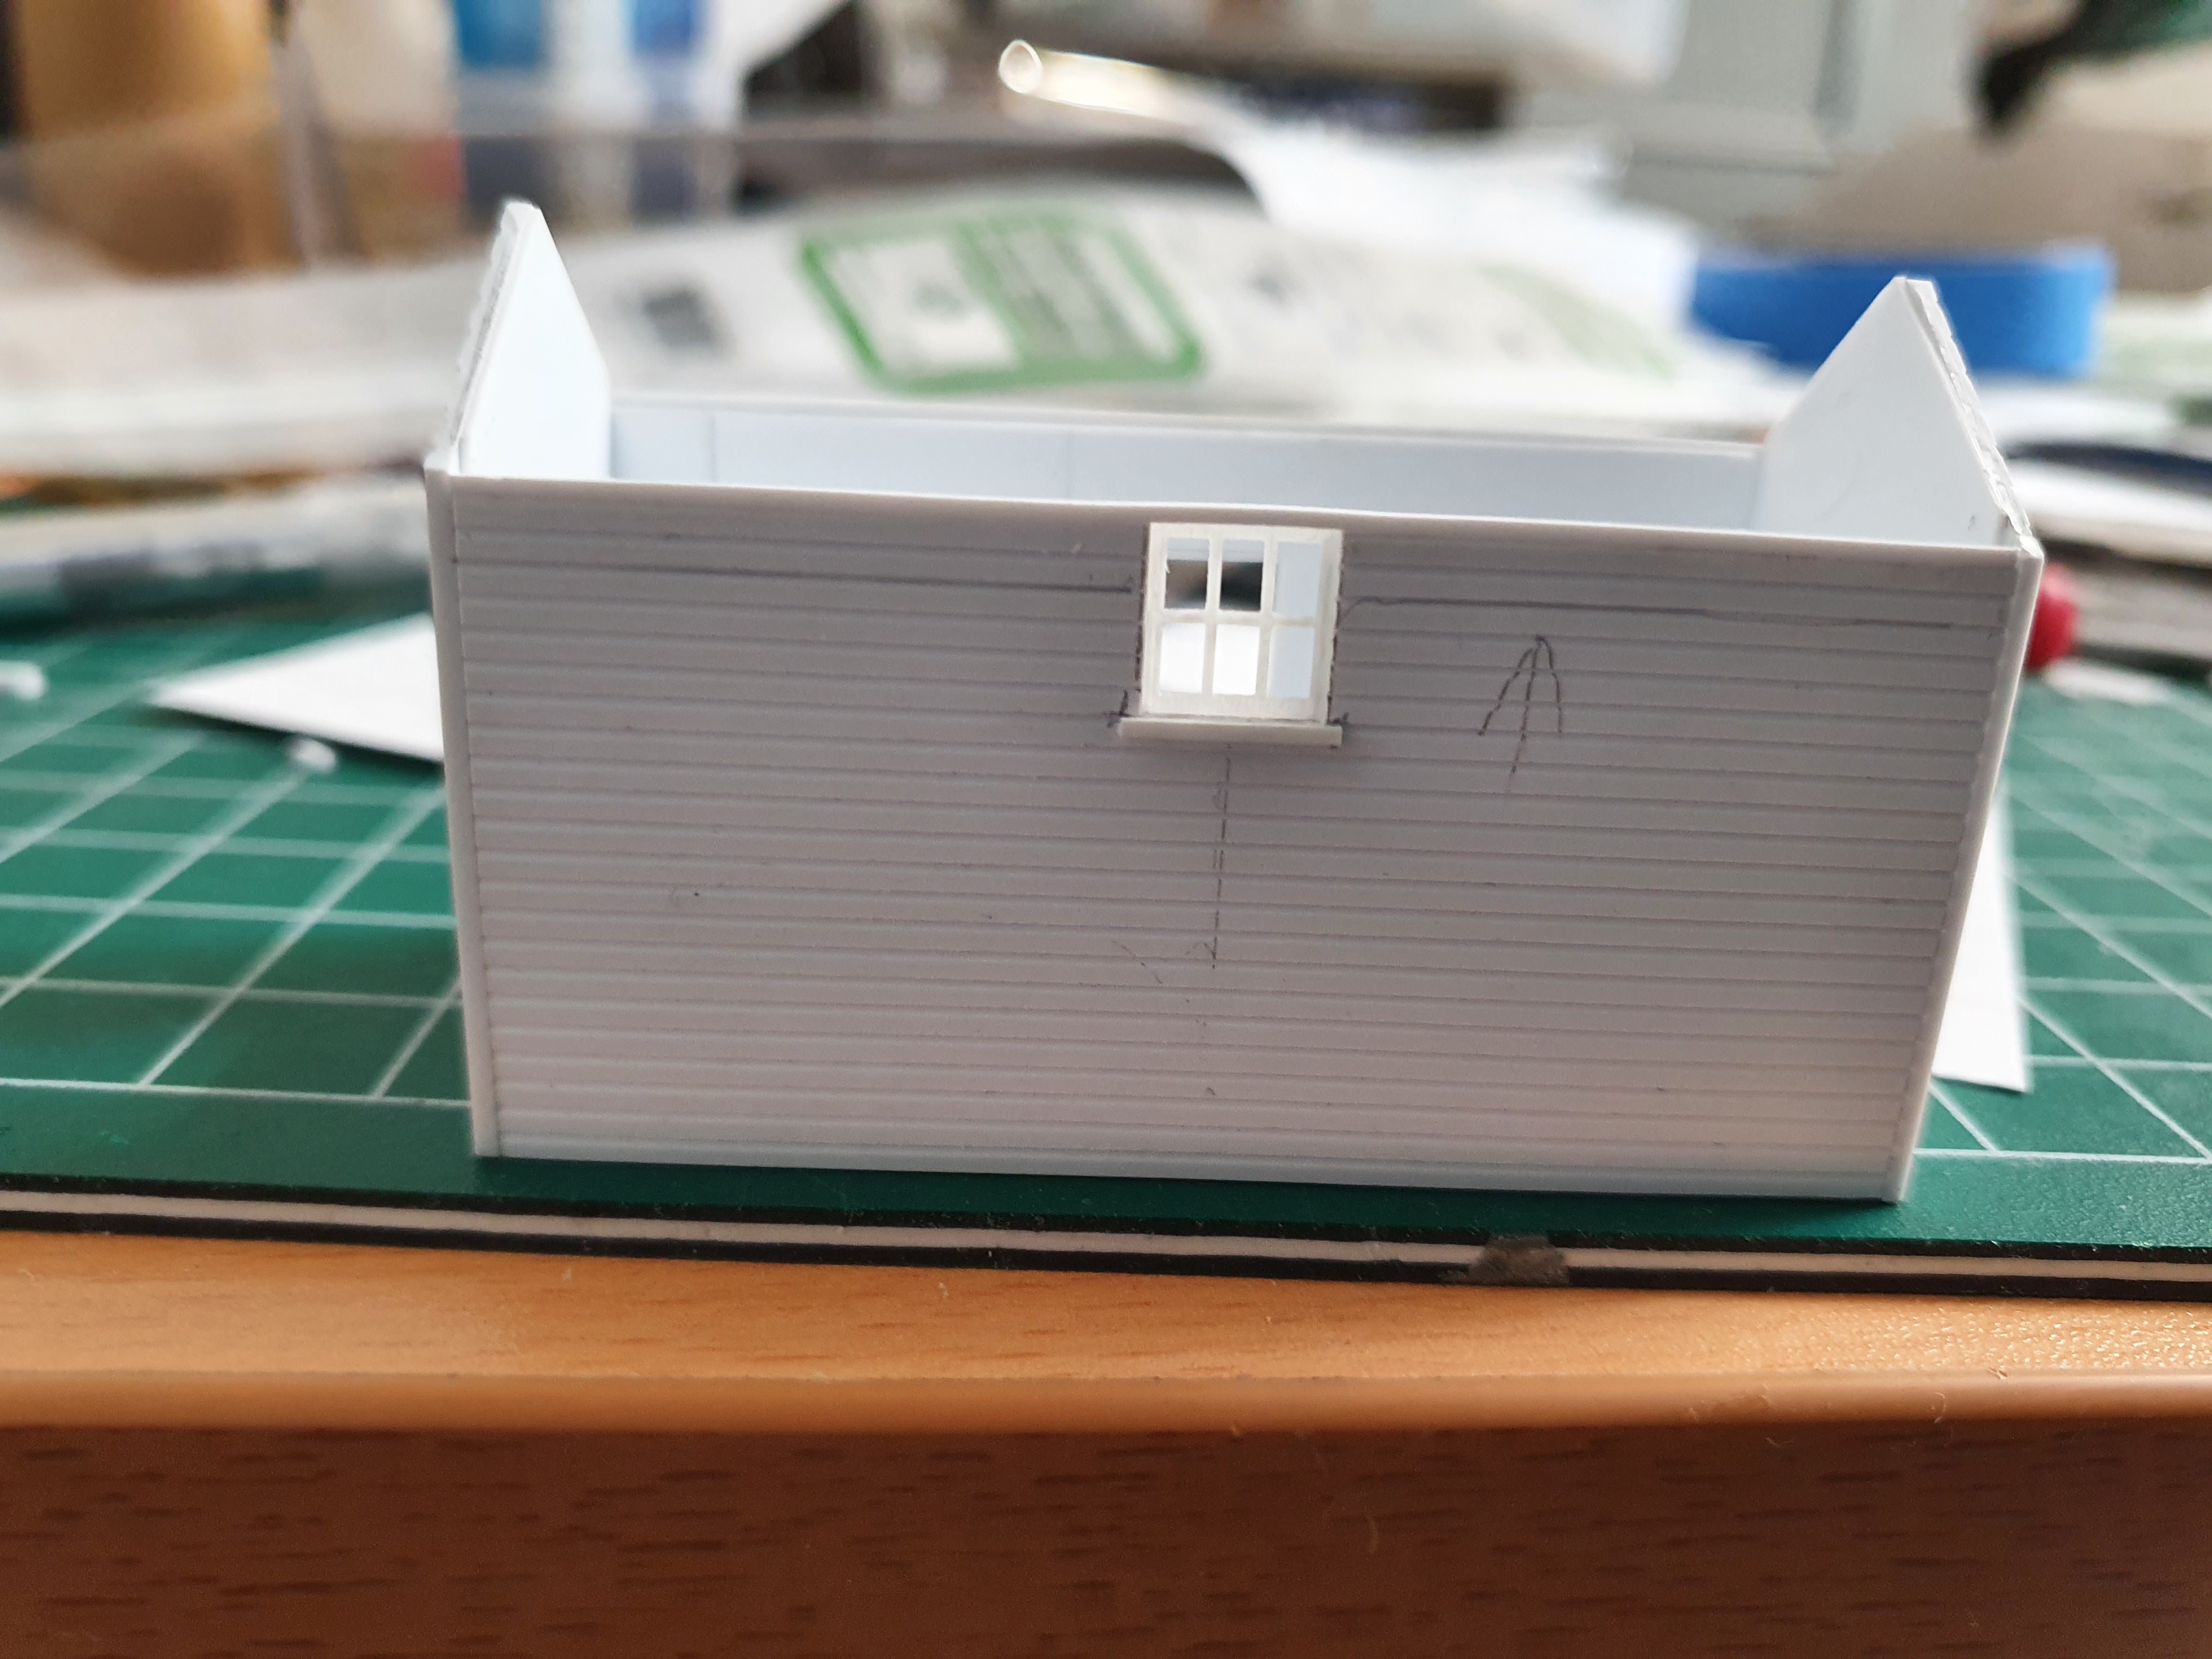
The Styrene Sheet used here is Evergreen Novelty Siding (4062) 1.5mm groove spacing on 1mm thick styrene Sheet. I have drawn out the dimensions of the walls of the Rest Cabin that are needed to be cut out. Note that I did both side walls and end walls to have the same vertical cut to ensure that they all are at the same width. Also worth noting that I have put an up arrow as a this side up for each wall to prevent having the walls being assembles the wrong away round. A very easy mistake to make especially when the styrene is not painted.

All four walls cut up successfully.

Door and Windows have been cut out. The back wall window is part of a 3D printout of a window that I did for the Wingello project a few years back. The Door is the Grandt Line 30" x 66" Planked Door (5293) and the Windows at each end are Grandt Line 28" x 48" 2/1 DBL Hung (5284). The Grandt Line Windows are not an exact measurement from the plans, but are very near enough to it.

I have used 1.5mm thick Styrene for the floor of the Rest Cabin. 1mm x 1mm Styrene Strips for where the corners meet. Another layer of 0.75mm thick styrene sheet was added on the inside walls to strengthen up the building.

All four walls and based are now permanently fixed together.

Roof has been constructed. I got right into the build forgetting to take some progressive shots. The most positive outcome from Roof construction, from the metal siding styrene sheet I was able to make a partial cut in the center and was able to fold into shape without snapping it into two pieces (which is rare for me to achieve). This had made it easier for me fit in the gusset which will served a few purposes such as strengthening the roof, holding the roof into shape and not allowing the roof to slide into place when fitted to the body of the building. I also forgot take progressive photos shots in adding the Roof Capping, the eaves and the guttering.

As the Grandt Line Widows were more of a 3 pane window, I needed to use the thinnest strip of styrene which is 0.25mm x 0.5mm Styrene Strip (Evergreen 100) and try to cut it at the precise length to convert it to a 4 pane window. Before is seen on the left, the after is on the right. I used the Tamiya Extra Thin Cement to adhere the styrene strip to the window frame. I found that the Tamiya Extra Thin Cement was great for this fine detailing work as it allowed time for the strip to be positioned in the desired place as well letting it also stick in place to the model before setting.

Both Windows completed.
Perch of the back window added using 1mm x 1mm strip of styrene.


Rest Cabin got primed, painted, windows glazed in clear styrene, windows and door fitted. Ready to be fixed to the layout when the time is right. I decided to go with a different colour, this time in a SMS Paints Mid Stone for the main colour, Natural Grey fo the roof and Dark Brown for the door, window frames and the guttering.
NSWGR Standard Sanitary Accomodation
Ok, this is seems to have been a fancy name for a toilet facility. With the photos I have seen of Muttama passenger platform, one of them shows a partial corrugated wall which seems to be a toilet facility that was not the typical design. However, a while ago, I did find plans in the NSW ARHS Rail Resource Center for NSWGR Standard Sanitary Accomodation ST152A that best represented the potential toilet facility to what could have possibly been placed on Muttama Passenger Station. In saying this, looking at other historical photographic examples of Stations that had toilet facilities that were not of the main stream design build up with corrugated Metal sheets and timber frames were located at Hill Top and Toolijooa, but not in the exact plan to ST152A but part of it. Therefore I decided to build the NSWGR Standard Sanitary Accomodation ST152A as from the plan.
Building Muttama's Station Sanitary Accomodation
Before I could start the construction of the Sanitary Accomodation, I had to draw out the plan with the to scale measurements before going ahead with the Build. I had some left over Evergreen Metal Siding which would have normally not been enough for most projects I do, but was more than enough for this build.
I decided to use Evergreen styrene simply to the fact that it is more robust when compared to the the foil corrugated sheeting. Unfortunately with the the Styrene corrugated Metal Siding option one side of the sheet is a flat surface with no Corrugations. Therefore, I had to ensure the parts of the model that were visible showed the corrugations.

I have drawn up a floor plan and provided a reference number for each part which was reflected on the left over styrene metal siding sheet which helps greatly in the construction of this model by removing any confusion on the assembly.


The top 4 pictures shows the main body of this model completed. Window frame I scratched build from styrene. I will glaze the window clear styrene sheet etched with a scalpel to get that louvered window look.

The plans stated that this Toilet facility had a concrete base, which I cut up a square bit of Styrene sheet for the base. Here I'm in the process of sizing it up to get the final cut done.

Model Painted up and painted on the main body and the concrete base. I left the areas that the main body of the model was going to be glued to the base unpainted to ensure the Tamiya cement glue can set properly. I needed to hold the model in place for approximately for 5 minutes to allow it to set into place. Note that I have at this point not trimmed the strips that support the roof. I needed to see how those strips got position when the model got fixed to the base. It is also worth mentioning that I have also attached the doors to the model before fixing the base on which are hard to see in these pictures.

Roof Support finally Trimmed and added foil corrugated more for a more realistic look. You will notice at the wall to the entry of this toilet facility that it is the flat side of the corrugated styrene sheet. As mentioned earlier, any part that is not visible will have the flat side of the styrene sheet.


Model Completed
To wrap the update on the build of the NSWGR Standard Sanitary Accomodation, The base colour for this model was done in Tamiya Natural Grey and light spray in SMS Natural Grey. The Tamiya Natural Grey is much darker than the SMS Paints Natural Grey. When I get to applying the back scene and add in the lighting to the layout, this will determine how well the galvanised effect shows and may be subjected to a little bit more of weathering work to get the desired effect.
Closing note for the July 2021 Update
Certainly the progress on the Muttama Layout has become at a rapid pace with 3 structures now at completion status. I'm currently onto the last line side structure which is the Stock Yard Races which is certainly going to be a new build challenge for me. More on that for the next months blog. Until then, stay safe out there.

Styrene to construct the Stock Races
Nice work peter!
ReplyDeleteRay P
Thanks for the kind words Ray.
Delete