Sunday, 20 October 2019

Painting and Weathering Narellan's Line Final 3 Line Side Structures Plus the Sydney Model Train Expo

Since my last blog update, steady progress has been made on the Coal stage, Office Hut and the Out House. I was hoping to get all of these line side structures completed and weathered before posting this blog, but felt that it would be best to leave that to another blog as I did come across an issue with one of my weathering tasks, therefore I will need to carry out a little more research and experimentation on.

On the October Long Weekend, I also attended the Sydney Model Train Expo which was hosted out at its new venue at Sydney Olympic Park at Homebush for the full 3 days of the event. More of Sydney Model Train Expo later in this blog.

Coal Stage
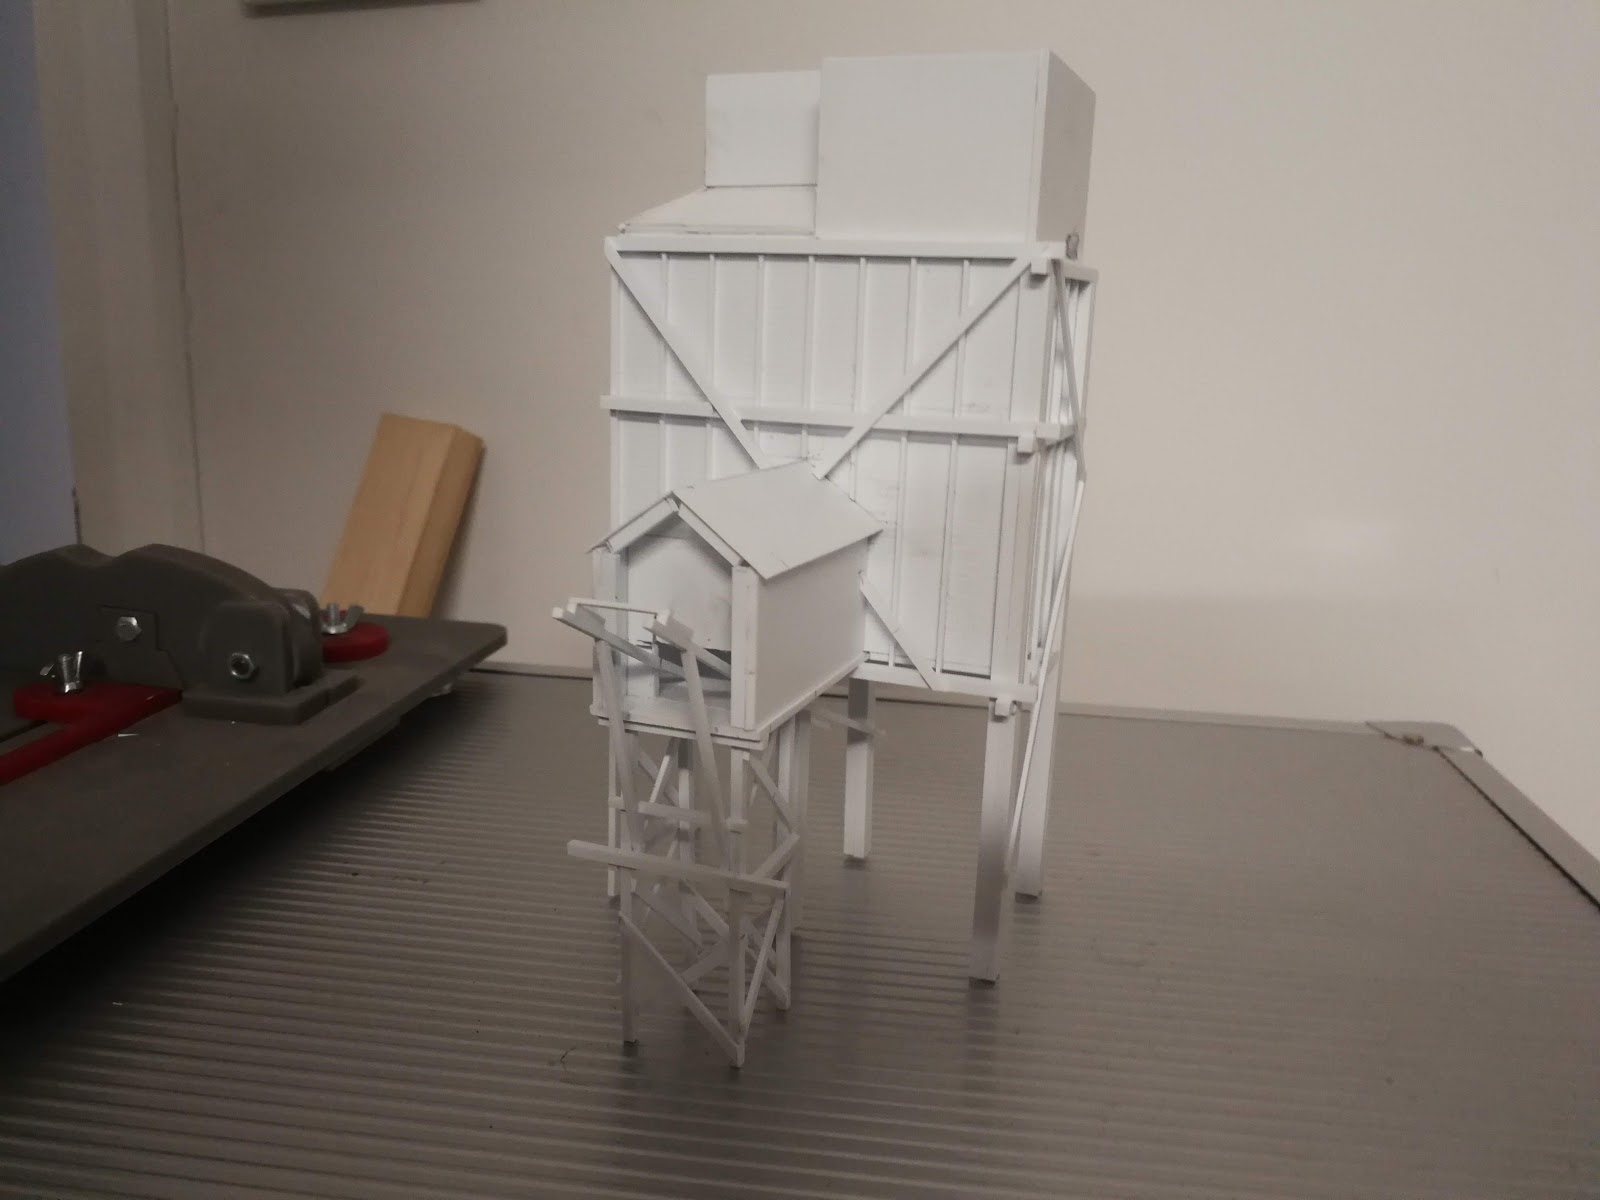
Corrugated Iron sheeting has been added to the model plus the cross bracing detailing on the front of the Coal Stage. This model has also been painted with a bit of a weathered look effect applied. Still a little more weathering to be applied, but intend to do this once the model is ready to be permanently fixed to the layout. So far happy with outcome of this model.


Coal Stage almost completed.


Office Hut for the Coal Stage
All that was really left to do with the Office Hut was to paint it, weathering it and glaze the window.
I could not find any photos that that clearly show what the colour was of this structure, mainly due to the fact it would have been overshadowed by the Coal Stage.

One thing that could be worked out is that the Office Hut seemed to not have been as badly weathered as compared to the Main Station Building and the Lamp Shed. This is probably because it may have been protected by the neighbouring Coal Stage, but certainly seemed to have received a good covering of Coal dust.


Office Hut for the Coal Stage all primed up ready for its paint job

I decided to Paint the Office Hut in Humbrol Mid Stone (Colour Code 225), which is the same colour as what I painted Main Station Building and the Lamp Shed.


Paint job completed with a little bit of the dried brush of Model Masters Rust Enamel paint on the roof for the rust effect

But then, I got way overboard with the weathering of the Office hut. In fact replicated the effect that I achieved with the awing of my Glenroy Pc1 Station Building where there was a nice blistering paint effect. Even though it was something that was perfect outcome for Glenroy ended up something that I did not want for the Office building. Basically, this was caused by too much paint thinners within the black paint I used to apply a black wash which in turn caused the paint job to blister. 

Thankfully, not too much effort will be needed to repaint the Office Hut, but will be doing some experimenting on other weathering methods to get the coal dust effect right for this model which will also need to be further apply to the coal stage. 


Paint blistering effect caused by too much paint thinners 


Paint job stripped back and the painting process stating from scratch


Out House
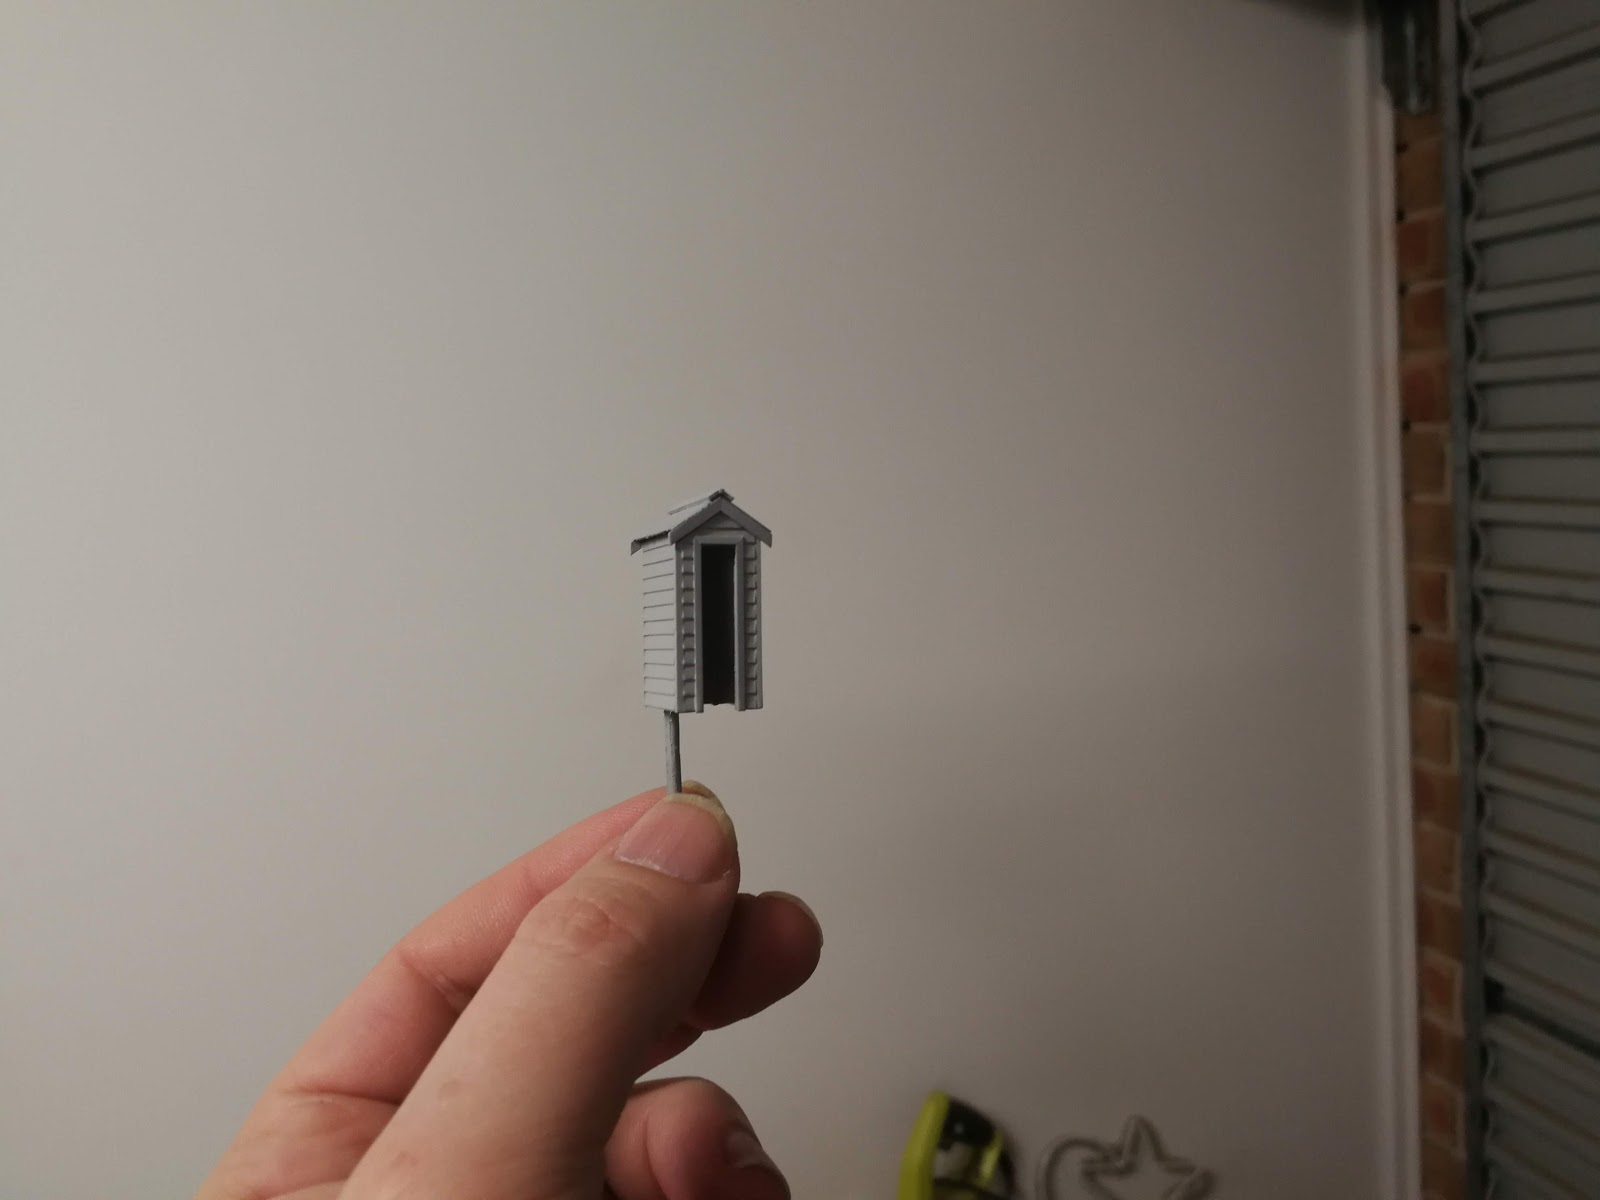
As mentioned in my last blog the few pictures of the Out House showed that it was surrounded by some thick landscaping that almost blocked it from full view. This is good as I was not fully satisfied of the outcome of the paint job, more so on the under coat colouring where I feel I could have added more grey colour to it. I have applied the rock salt weathering method before applying the top coat. I have used again the Humbrol Mid Stone 225 as the top coat colour.


Painting task from start to finish. Rock salt weathering method applied. Rock Salt removed approximately 4 hours after the top coat was applied.

In a normal circumstance, I would have stripped back the paint work and have started again, but as I do intend to heavily landscape around the Out House where only a part this structure can be seen, I decided to leave paint job as is.

Sydney Model Train Expo
Since the announcement earlier on in the year that the Sydney Model Train Expo was to move from its traditional location of Liverpool Whitlam Center over to Sydney Olympic Park at Homebush certainly stirred up a lot of talk over the last several months.

As much as I loved going to the event when it was Liverpool in the past several years, the last 2 years have shown that the interest from facility was more focused on how they can expand their own day to day business with other Sport and Recreational areas such as a squash court and a gym areas, which has in effect been forcing the downsizing of the space that was made available to the once a year model rail exhibition, which would have compelled AMRA NSW to find another location to suit this event.

This year, I was involved in running two layouts at this event across the 3 days.
The time came for the event and I did see a few challenges encountered by those coordinating event and with some of the exhibitors, but fortunately no epic disasters were seen. Issues that can be learnings which will hopefully help streamline for a smoother running event for 2020. But certainly, the new venue at Olympic Park in Homebush provided a lot more floor space compared to what Liverpool could have provide now.

In all, it was a good show, a country mile better compared to last years show at Liverpool. From my point of view, it was good to see that there was a good mix of Australian and International themed layout and seeing some of the classic layouts appearing at this event.

Even though it did not seem to drag in the crowds making their way to the NRL Grand Final, however Saturday and Monday seem to have drawn in a good number of crowds to this exhibition.

To close this topic off, well done to those involved in making this event at a new venue as a success given the challenges that they encountered. Hopefully we will get to see this exhibition return at the same venue in 2020.

Bullenbung Creek a classic NSWGR themed layout

O scale 13 Class Locomotive traveling through Arakoola

Auscisions Exhibition Announcement of the upcoming NR Class locomotive in N Scale. Could this see a start for a bigger following in Australian N scale?

On a closing note, I have noticed this recognition from of fellow model rail bloggers and along with them I do want to give an honourable recognition to the Layout Passing Time. Certainly a great option for a layout if you do not have a great area of space to run a layout or have a large vehicle and a trailer  to transport a large layout. Certainly, he has proven you do not need a large layout not to just run your trains or impress the paying crowds at an Exhibition. I do hope to see Passing Time at a few more events as well as seeing a few more layouts produced from this railway modeller in the future, as Im sure his next model rail project will be as good or even better.

Great impact with detail in the scenery with Passing Time.


Sunday, 22 September 2019

Narellan The Final Three Line Side Structures Progress

After a bit of break from working on Narellan after getting a good part of the project completed within the first 6 months when I started it. I have recently managed to get the momentum back on working on the final stages in completing the last of the remaining Line Side Structures, which consists of the Coal Stage, The Office Hut for the Coal stage and an Out house (also known as a Water Closest).

Narellan Coal Stage
I have model only a part of the Narellan Coal Stage which is going to serve the purpose of acting as a scenic break for the Camden End of the layout. I felt it was important to reflect that this structure was once in existence. Unfortunately, I have not been able to source any plans for this Coal Stage, therefore I had to do a fair bit of reverse engineering work to come up with the result of the final structure. One thing worth pointing out with the Coal Stage that was once based at Narellan, is that over the last several years of the operation of the Branch line to Camden, the coal stage seemed to have received several modifications. This consisted of the extension of the roof section. Steel Framing was placed around the structure, my guess is to either strengthen the structure or repair a structure that may have been failing.

The Coal Stage version that I have constructed will be mostly in its original form.

As for the reverse engineering of this coal stage, I looked at other similarities of coal stages on the NSWGR Network where plans still exists, it seems the one based in Narellan was rather unique in several ways. The Narellan Coal Stage was purposed to fill up coal tracks (Such as CCH, S, K and BCH truck) so it can be transported via rail, where as the others in the state were there to fill up locomotive tenders or coal bunkers.

Early Stages in the construction of Narellan Coal Stage

Before I started the construction of the Coal Stage, I was in the thinking that it would be a straight forward build, but after obtaining more photographs from the NSW ARHS Resource Center, I found myself needing to make serval modifications to what I have already constructed. Therefore I have made several Changes.

First re-modification attempt

Second re-modification attempt after further research was conducted

Where Im currently at with this build

At this current stage Im happy how everything is piecing together with the Coal Stage, giving me the faith that even though it is only a portion of the structure that is being modelled here, it will work well once completed and placed on the layout. Just only a few items to do to complete this model.

Office Hut For The Coal Stage
This structure could have an offical name for it, but I will term it the Office Hut for the Coal Stage.
This structure is very similar to the Lamp Shed that I constructed in the first round of Line Side Structures that I constructed, therefore I went off the profile of this structure. Currently, this model is ready for another prime, then paint and a few other minor works to get this one completed and placed onto the Layout.

 Early stages of the construction of the Office Hut

Approximate location on the layout where the Office Hut will be placed 


Model of the Office Hut all primed up ready for the painting

Coal Stage and Office Hut assuming their position on the layout

The Out House
So far, I have been though a few hundred of photos of Narellan and ironically, only a very few show the Out House to be in the scene. One of these interesting shot I found on the Graham Ahern site (https://www.grahamahern.com/standard-gauge?lightbox=dataItem-iyy0gym6) shows a good part of the Out House within the under growth. Perhaps other laboratory facilities were available near by and may have been more preferred. Certainly considering placing some thick landscaping around the Out House once if is fixed to the layout as I think it will get a bit of attention when this layout is at exhibition.
Fortunately, there are diagrams that I have been able to source on a typical Out House to the likes of the one that was once based in Narellan.


Construction stages of the Out House, Door and Glazing are yet to be completed

My Closing Note
Over the next month I will be continuing to work on getting Narellan finished to be ready to take it to Exhibitions in 2020. 

I will also continue to work on some of my N Scale Locomotives and Rolling Stock to hopefully get them ready for an upcoming model rail exhibition. 

Tuesday, 20 August 2019

Random Subject Post For July and August 2019 Which Includes a Little Bit of N Scale

Well for me it has been a while since my last post, which is due to a few reasons.
After the Rosehill Racecourse Model Rail Exhibition back in June, I decided to take a couple of weeks off from railway modelling activities as I have been working hard on model rail projects since December 2018 until June this year. I have been working hard in getting Narellan built and helping to get Wingello ready for Rosehill. At that point I just needed a little time off from the hobby.

From June to now, I have had a few misfortunes in catching more than a few of the winter bugs that have been circulating around. Also my work load has also increased a fair bit over the last couple of months in which has prevented me from going into my workshop to continue working on my model rail projects.

I do have to mention in that time I have gone to a couple of Model Rail Exhibitions which have also drawn me away from working on model rail projects.

Current work in progress office hut that will be placed next to the coal stage on my Narellan Layout.

I was hopeful to have completed the remaining there structures for Narellan and have a post summarising all of the buildings that I built but hopefully the upcoming weeks will present some spare time for me to get some work carried out and complete Narellan and other minor projects.

However, I did manage to get a little Railway Modelling done.

Now For Something Completely Different! N Scale
When I started to have the faint hearted interest in building my first model rail layout just after getting married back in 2007, My Wife set some very strict boundaries that I could not construct a large layout in the spare room in the house we were renting at the time where she also set a limited area that I could use.

At that time, I felt that the only option was to do an N scale layout. Initially, I was going to do an American N Scale layout, mainly due to the fact that I did not know where to look for any Australian N Scale product and at that time, most American N scale models had the very decent detailed models on the market. That plan ended up not happening and then I decided to look at the British N Scale options, which progress further then my America N Scale layout ambitions. Basically, the Baseboard was constructed, (but done the wrong way), track got laid, but in the end I encountered issues that prevented the completion of this layout due to other several issues that were encountered. After that I did decided to collect my NSW HO Locomotives and rolling stock with the longer term plan in mind to move into a larger home that can potentially cater for a HO scale layout. During this point (several years ago), I went to the Sydney Model Train Expo at Liverpool where I came across a relative of my Wife who just so happened to be heavily involved in NSW/Australian N Scale railway modelling and had a store which was selling the Gopher Models 48 Class Locomotives with a show special combo package deal. My Wife asked me if I wanted one for Christmas, where I responded quickly with the words why not. From there is where my following for NSW N Scale has started gradually to build up.

Gopher Models (also known as Badger Bits) N scale NSWGR 42 class ready to run. These models do require you to decal your desired loco running number. I will be applying them in the upcoming weeks and will post how I will apply the decals and share if the decal effort work out or not.

Modelling NSW N Scale Today
Currently N Scale for NSW do not have a great range of ready to run Locomotives and rolling stock available on the market as compared to HO Scale. Therefore, it you want particular items of rolling stock and or locomotives, you would either have to source it as a kit, 3D draw the item and create a casting for it or scratch build it. At this point of time, you can purchase 48 Class, 42 Class and 44 Class Diesel Locomotives from Gopher Models (also known as Badger Bits) that are complete ready to run models, but you will need to apply decals for your desired running number.

There are a few talented railway modellers who have built these models, made castings of them and have made it what they have casted available to the the market. Typically for locomotives, there are mechanisms from locomotives from other global N scale manufactures that are a close match to some of the NSW Locomotives wheel configurations where the railway modeller builds the locomotive body work to fit around the mechanisms. This is often an expensive practice on the basis that you will need to purchase a ready to run locomotive a cost to produce a NSW Locomotive.

Either way, N Scale, not just for NSW Prototyping, but prototyping for other states in Australia is still more for those who want practice in serious railway modelling for the longer term. Though I do expect in time that more ready to run Australian models will make their way onto the market in the years to come which may make N scale an attractive option, especially for those that have only limited space to run a layout. Especially where more more modern day housing is becoming more compact in size compared housing many years ago within major capital cities.


My N Scale Badger Bit 48 Class I purchased years ago with rolling stock I purchased from a deceased estate store that was at the Newcastle Exhibition running on the Tarana N Scale Layout.

Commencing the Painting and Assembling of  the Peter Boorman N Scale Carriage Kits
My Model Rail Club had an invite to attend the Our Town Model Train Show in Newcastle. We decided to take the N Scale layout of Tarana to this event.

At last years NSW AMRA Exhibition at Liverpool I acquired several Peter Boorman N Scale Carriage kits. My intentions was to try and get these kits constructed and completed before the exhibition at Newcastle thinking that I would have the time to complete them, but as stated above, I had those set backs get in the way of completing these models. However, I will like to show what I have covered so far.

Couple of the Peter Boorman N Scale Carriage Kits before unpacking

However, I'm hoping it won't be too far off for the next exhibition to not only run these carriages in their completed form, but also have a few of my Gopher Models decal and possibly weathered.  Furthermore, after discussing my current efforts with one of my Model Rail Friends who have already completed the same kits, is that I may need to make other minor modifications to get them working smoothly.

Either way, I would like to share the progress so far with these models.


These casted model kits need to be cleaned up by removing the flashing from the windows and around the base of the model and the floor section of the carriage. I used a new blade in my hobby knife to do this clean up work.


Flashing has been removed and the Carriage is able to be placed comfortably on the floor section of this kit. I have been advised if not to force the carriage into the floor section of the kit as it can break the casting.


Models were washed in warm soapy water and left to dry, then primed up ready for painting.


First Paint Job done with Raileys Paint Indian Red. This is an enamel paint.


The painful job of masking up seven carriages was done for the yellow lining to be painted on. The kits do get included yellow lining decals, but I feed you get a better result to paint them.
I used a Model Master enamel yellow paint that I find drys very quickly for an enamel paint, roughly about 1 hour after the paint was applied, I decided to remove the tape to checkout the end result.


Next phase, I taped up the model to allow the roof to be painted. I used Humbrol 67 (Tank Grey) as the Base coat and later gave a light spray of Model Master Flat Black to weathered black roof colour.


I decided to paint three of my carriages roof sections with the end navy dressing with Humbrol 225 (Middle Stone) and later on finished painting the remainder of the roof with Model Masters Steel paint.


Decals started to be applied. This is the first time that I have ever applied decals on a model rail kit. However I found that you do have to give the decal a good soaking for over a minute so that the decal can be removed form the paper to the model. Placement of decal was done with a paint brush. Once in its final placement, gently patted down the decal with a cotton bud and applied Micro Sol onto the decal to soften the decal to allow it set flush with the profile of the model.


Once the decals were dried up, sprayed on a coat of Testors Dull Coat. Dull coat has not only removed the gloss look from the model but will help sealed the decals on the model. I have put along side my dull coated model next to a yet to be decal and dull coated model to compare the difference in colour. In short summary dull coat will remove the gloss look from the paint work, but also can change the tone of colour on model, giving it a bit of an aged look.

More to come in my N Scale Modelling efforts in my upcoming posts.


Sunday, 14 July 2019

The Electronics of Narellan

From my last post, I stated that I will keep the wiring and electronics for Narellan as its own blog. The reason for this is that the electronics work is a large and a time consuming task to do. For me personally, electronics is not a difficult subject as it was something that I did as a hobby a lot during my younger days, but still it can be a confusing task for many out there.

This post will be more of a reflection on my experience in wiring up Narellan rather than a how to do post. In the end I managed to get it completed in a functional state, also resulting in the swear jar getting filled up a several times over.

Layout Electronics Boring But Important
Not matter how well the layout is presented, if the electronics are not properly in place to allow for the smooth operation of the layout, it has an impact on the level of enjoyment both from those operating the layout and for those watching the trains run on the layout.
My suggestion to anyone before wiring a layout or deciding to use DC or DCC options is to do some searching on the Internet or Youtube as there are some straight to the point videos and instructions where there are some presenters that have gone to the trouble to demonstrate the difference how each of them work in practice. They also highlight the typical scenarios will be faced and present on what solutions that are out there to overcome these challenges.

In general, there are solutions that are low budget and high budget which I will not go into too much detail.

Wiring work in its early stage

Narellan Electronics
Electronics for Narellan are as follows:
- Wiring up the track work for DCC operations
- Points, Point motors and Point switching
- DCC Bus Wiring
- Lighting for the layout

Aim: Is to try and keep wiring to a minimum and ensure that any electronic component is not at risk of getting damaged at during transportation or storage. Also have smooth running especially for DCC Sound chipped Locomotives.

Points And Point Switching
For the Fiddle Yard for Narellan, I selected Peco Code 75 Electrofrog Points. Peco Electrofrog points do get provided with, some clear instructions on on how to wire them up on their packaging.

For the Point Motors, I opted for the Gaugemaster PM4 Self Latching SEEP Point Motors more so for their compact size and their compatibility to work with Peco Points. It is worth making this point about the PM4 Self Latching that they have a spring that is meant to help with the throw of the point. I was sold on that spring being there as I was thinking if the spring that is in built into the Peco point became sprung that the spring in the point motor would act as a fall back option removing the need to replace a point. However, I found out later that the spring ended up being a big hinderance then a help, as it was working against the point throw and some times preventing the point from throwing at all. That issue ended up getting resolved by removing the spring from the point motor. After I removed the springs the points were able to be thrown with no issue. Therefore, I should have opted for the PM2 SEEP Motors from Gaugemaster as they do not have the spring installed but has the same features as the PM4. Both the PM2 and PM4 both have the circuitry build in to allow for the polarity change to the frog in the point each time the point switches across. I should also highlight that SEEP motors (or Solenoid motors) will only work with Peco or Hornby Track as they are spring loaded as other track such as handmade or non spring loaded points may not be able to handle the impacted of the point throw from a solenoid motor.


Gauge Master PM4 SEEP Point motor

For the Point Switching Control I did a fair bit of searching around to find an effective solution. Having operated from different Layouts in the past, I have found scenarios where I have to move from one side of the lay out to the other just to set the path for a train to route through. Or the point switching panel is positioned elsewhere on the layout away from the controller.

During my researching, one of my model Rail Friends mention these Colbalt AD Solenoid Decoders that are manufactured by DCC Concepts. They are basically a device that has a cover protecting the electronic components (as many point switch solutions have their electronic components exposed) but provides a number of options such as switching points via your DCC Controller or via a switch. They also provide a feed to the Frog that switches polarity and even has outputs for LED's if you  wish to light up the current status of point on a track diagram of your layout.

AD-S2sx Solenoid Decoder being tested out before its installation


AD-S8sx Solenoid Decoder installed

I opted for this solution as I would be able to still run trains and be able via number of programmed Macros (which you pre-program) to set the respective points for the route you desire your train to run on. This removes the need to constantly running around the layout setting points all of the time.

Also these Colbalt AD Solenoid Decoders only needed to be connected to the DCC bus to be powered up, hence removing the need for additional power supply just for the switching function.

However, they have their disadvantages, which I only encountered during installation of these units. I would like to share these issues just for awareness, which may prevent others making the same error as well as something to take into consideration when purchasing these AD Solenoid Decoders.

First issue I had, with one of the AD-S2sx units. I spend a full day of wiring which does numb your thinking after a few hours and I accidentally connected what was supposed to be the DCC feeds for the Frog feed into one of the LED outputs. When I powered up the layout later on, one of the points was not throwing. I traced the point wiring it back to the AD-S2sx and worked out that I wired it incorrectly. I then wired it correctly, however, the point motor was constantly clicking. This wiring error has not only caused the particular point output to be no longer functioning, it also the impacted unit which was also getting very hot. I had to trash that AD-S2sx unit and was lucky just to get the last one at the supplier that I have acquired these AD-S Units from.

The AD-S2sx that became defective after the incorrect wiring incident

Second Issue, Myself and another Model Rail Friend of mine, were doing the fine tuning of the points, making sure no shorts circuits were happening when running trains and making sure that the point throws were consistent to what was executed on the DCC Controller. We made the error of changing the wiring to one of points connected to the AD-S8sx unit whilst still powered up. We started to hear a point motor that was constantly clicking. Darn it, another point output gone and on the more expensive AD-S8sx unit. Fortunately, there was two spare outputs I was able to use and the high temperature issue that was observed in the AD-S2sx case was not present.

So to sum up the learnings here, make sure the wiring is correct, validate the wiring. Power down and use the CDU Discharge button to drain the unit of power if you need to do any wiring work. If you follow these learnings, you will avoid damaging your AD-S8sx or ADS2sx unit. Hopefully in future versions of these Solenoid decoders DCC Concepts build in some failsafes to prevent these issues from happening. Other than these issues once they are setup correctly, they do work well and I would definitely still consider using these Solenoid Decoders for future projects.

My personal recommendation after installing these Solenoid Decoders, is to just get the two point output (AD-S2sx) unit more to the reasons that you can install them close to the points that need to be connected, removes the need to have bridging wiring from another module (as in Layout or Fiddle Yard Module. If your Solenoid controller was to fail, it is also cheaper to replace a ADS2sx compared to the ADS8sx. The instruction state that you should be able to throw two point motors from the same output, but I was not able to achieve that when trying this throw two point from the same output. I did these tests with the springs still installed in the Point Motors. My feeling is that the dural connected solenoid concept will most likely only work on smaller solenoid motors like for N Scale point motors as I just could not get much of a budge with any of the 2 x point motors when trying this out.


DCC Bus Wiring and Wiring up the track work for DCC operations
I won't go into too much technical detail for the DCC bus wiring. Basically I have made use of the track and provided DCC Power feeds to each of the section of Track that was between points that where isolated. I basically created a Positive and negative DCC Bus ring circuit and from that it seems no issues with getting DCC Power delivered to every bit of track on the layout.

I will not show much of my completed wiring effort yet as it was a bit of a rush job to get it ready for the Modelling the Railways of NSW Convention back in May, but intend to do some tidy up work on it later on.

Lighting for the layout
For an exhibition Layout, one thing I have observed in the past is, that florescent lights present a flickering on video and can take up a some valuable space when traveling to events if they are not permanently fixed to the layout.

I was directed to some good cheap warm white LED Strips from Ebay which has worked out rather well for the Narellan Scenic section. Basically, I have used all 8 LED Strips that I was supplied with (in fact I could have got away with using 4 of them) and they have lit up the scenic section well. To power all 8 LED Strips, I have used a 12 Volt DC 2 Amp Power supply unit. I have found that a 1.5 Amp Power Supply did not have enough power to power on all 8 LED Strips.

LED Strips are noticeable on the to right hand corner of this picture. I have used 4 LED Strips for each scenic module

To close this blog off, I will like to place in some links for reference

Chadwick Model Railway - Insulfrog or Electrofrog Points 

Chadwick Model Railway - Model Railway DCC Bus Wiring (Note: As mentioned in this blog, I have made a DCC Bus ring circuit. Charlie the Presenter has made note to place a break in the ring to prevent any timing issues. I would agree on that point in theory. However, no issues have been encountered yet with my DCC Bus ring circuit. Perhaps an issue for larger layouts. Either way, a good presentation on DCC Bus Wiring and worth watching).

Everard Junction - How to - Episode 6 - Install a point motor
(Note: Good explanation provided from the presenter on seep motors, wiring and and their additional benefits)