Just over one year of starting Narellan, I am please to announce that this layout is completed to the point that it can now be exhibited in Public. Certainly, I can now cross off my bucket list in building a NSWGR themed HO scale layout that is functional. However, I believe from point on that changes on Narellan will be made where appropriate. I do believe that many Model Rail Layouts are ongoing projects well after their point of completion. In fact, I already have a couple of things in mind to do.
The final stretch in completing Narellan involved in getting a lot of small items constructed and added onto the layout.
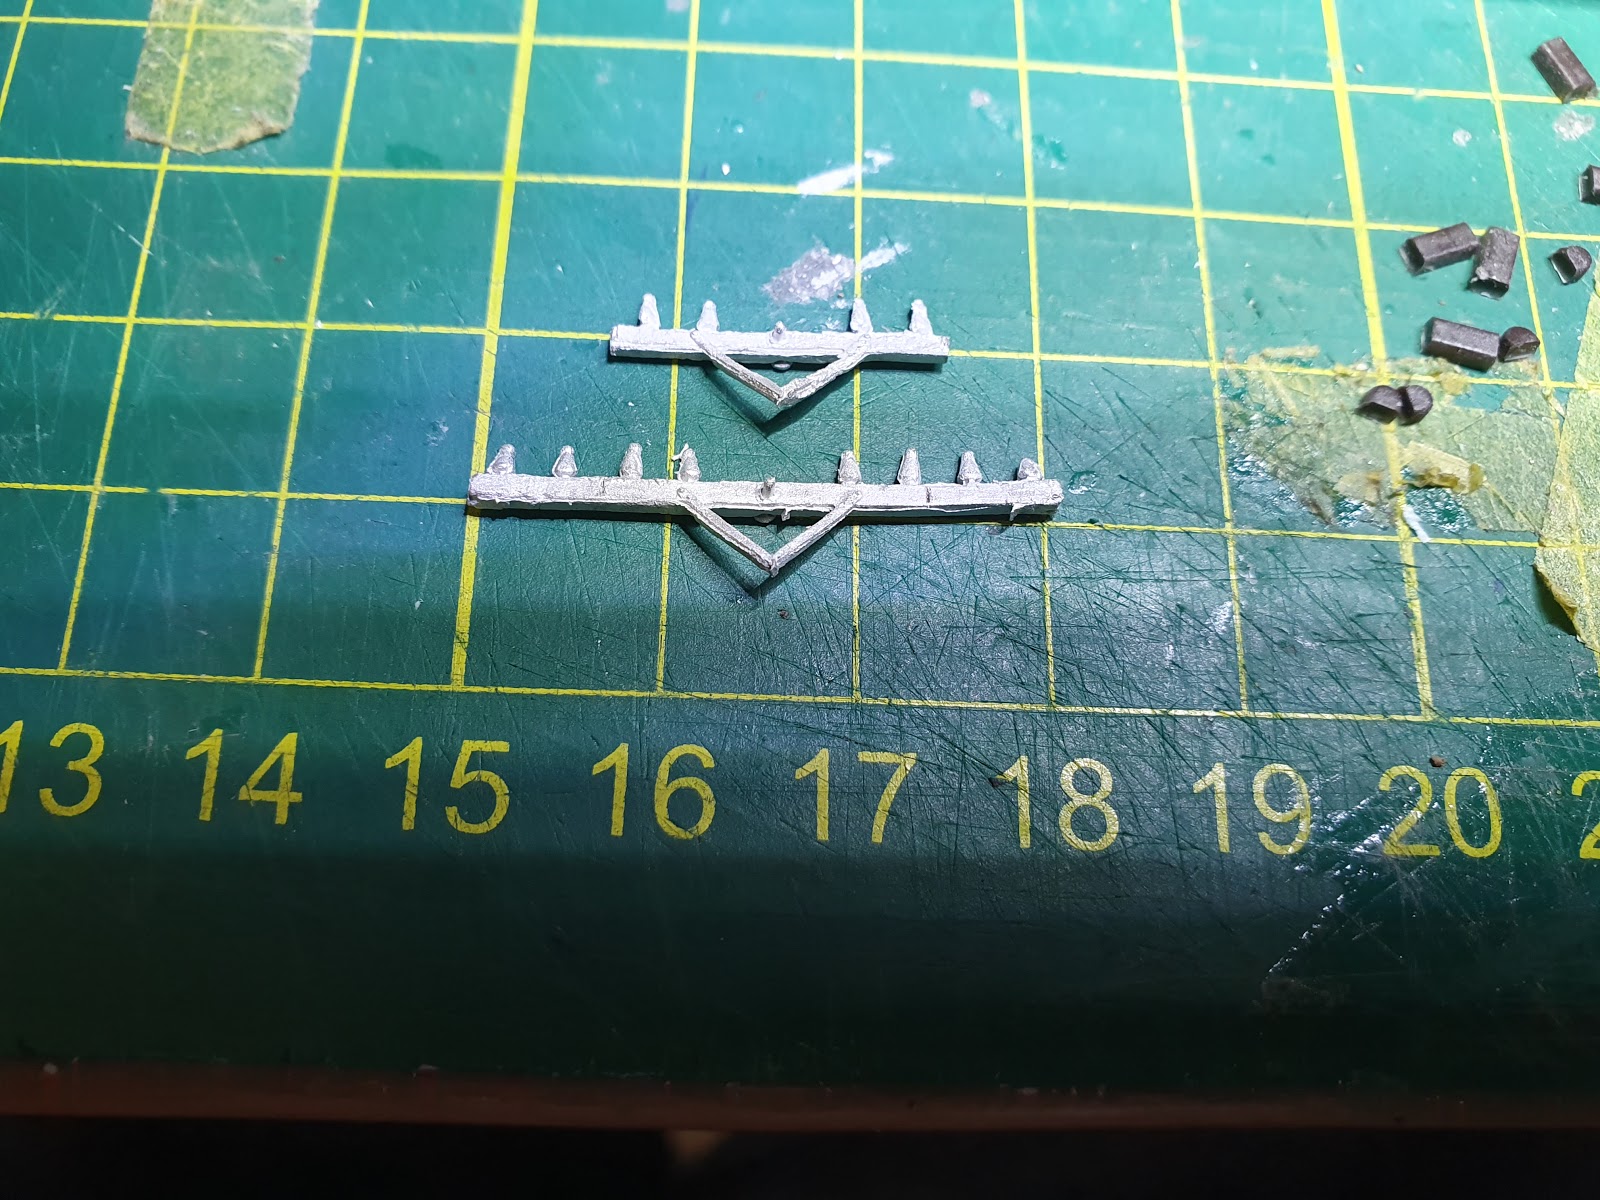
Ground Throws
After completing all of the ground throws, painting was needed to have them completed. After a couple of inquiries, I learnt that the colour of the leavers determined the purpose of the leaver.
Blue - For Locking of the frame
Black - For points
Red - For Signals

There are a few photographs that are in colour of Narellan Yard, but not that many show good detail of the Ground Throw setup and appropriate colour for the Ground Throw Leavers. Therefore, educated guessing and doing further consulting with others was needed to decide on how the Ground Throw Leavers were to be painted.


Signal Lever Block
For the Signal Lever Block for Narellan, it was a 6 Leaver Block. You will find that looking at other locations that out door signal Blocks will have a variation of the amount of leavers that they have on them. Therefore, I would have to prototype one to looks similar to the one that was once at Narellan that I would need to kit bash one up.
I will mainly focus on how I did the construction of the Signal Lever Block as painting is already covered with the Ground Throws.
I decided to construct the Signal Lever Block by Kitbashing 2 x Andlan Models 3 Lever Ground Frames (AIM 104), which will involve one of the Levers Plates to be cut as shown in the following photos.


 Painted and ready to be placed on the layout

Platform Lighting and Telegraph Poles
This task was one that I have been nervous about for while, as there is not much product out there that has the type of platform lighting, therefore I have been looking around for months for the solution. Fortunately, back during my Christmas break I did a visit to Casula Hobbies and whilst I was looking for other items, I stumbled across Ratio Swan Neck Kits (Ratio Kit 453) where at that moment I had a light bulb moment (pardon the Pun). This kit had the Lampshades that were a very similar match to the NSWGR Lampshades. From there, I decided to venture into scratch building the Platform Lights.
For the interest of not making this Blog post long and the fact that I did not take many photos of steps that I took to build the platform lights. I will not go into the full detail on how I constructed these lights for now. I have decided not to install LEDs for lighting as I do want to keep the electronics on this layout simple for now. However, as I did use brass tubing for the main bracket of the Lamp mounting which should allow for fine wiring to be fed through to power up a LED. I do want to experiment in building one up and wire it up to be lit up. Topic worthy for its own future Blog with the aim to have step by steps details provided.


 Telegraph Poles Primed with Model Masters Grey Primer and then a bit of Tamiya Hull Red Paint to for the effect. Station Lamps Painted and placed ready to be finally installed.


Items for the Platform
Before I go into summarising the activities for the platform items. Some of you may have observed something wrong with the scales in my previous pictures where it has appeared in. Basically, I assembled it incorrectly, and yes it was a bit of rush job and was only meant to be a temporary setup until I worked out to model one that is closest to the version that was once based at Narellan. This set of scales was planned to go over to my eventual Tumbarumba home layout. Learning here is, never assume and model when you are almost falling asleep. It was a good wake up call, but thankfully something I can pull apart and start over again.


The final stretch in completing Narellan involved in getting a lot of small items constructed and added onto the layout.
Ground Throws
After completing all of the ground throws, painting was needed to have them completed. After a couple of inquiries, I learnt that the colour of the leavers determined the purpose of the leaver.
Blue - For Locking of the frame
Black - For points
Red - For Signals

Ground Throws and other items primed up ready to be painted
There are a few photographs that are in colour of Narellan Yard, but not that many show good detail of the Ground Throw setup and appropriate colour for the Ground Throw Leavers. Therefore, educated guessing and doing further consulting with others was needed to decide on how the Ground Throw Leavers were to be painted.


Paint job completed on the Ground Throws
Signal Lever Block
For the Signal Lever Block for Narellan, it was a 6 Leaver Block. You will find that looking at other locations that out door signal Blocks will have a variation of the amount of leavers that they have on them. Therefore, I would have to prototype one to looks similar to the one that was once at Narellan that I would need to kit bash one up.
I will mainly focus on how I did the construction of the Signal Lever Block as painting is already covered with the Ground Throws.
I decided to construct the Signal Lever Block by Kitbashing 2 x Andlan Models 3 Lever Ground Frames (AIM 104), which will involve one of the Levers Plates to be cut as shown in the following photos.

With the Plate for the levers from the First Kit, carefully cut the tab off as shown above.

With the Plate for the levers from the Second Kit, carefully cut the edge off as shown above.
I did rush through this task a bit and got myself into a spot of bother when trying to join the plates together. I wanted to join the plates up first in order to make both plates to be consistent with one another when I bent them into shape. I was able to easily achieve this, but found later on when needing to bend the rest of the frame together, that the linkage (which was bit of sprew that I cut to length from the kits etched frames) I accidentally placed in area that had fold line which ended up becoming a major task to resolve my error. If it was not for that error, then it would have been a straight forward process like the Ground Throws to build.

The completed lever plate
Again, the Lever Plate would have also had a better finish if I did not make earlier error, but fortunately, I was able to place a layer of solder to smooth out the area the not so perfect side will be out of view once it is placed onto the Layout.

Main body of the Signal Lever Block has been completed. I had to also remove the respective sides framework structure from but kept the baseplate on both kits which I soldered together in order to get a firm foundation.


Levers Installed


Where the final placement for this signal block will be
Platform Lighting and Telegraph Poles
This task was one that I have been nervous about for while, as there is not much product out there that has the type of platform lighting, therefore I have been looking around for months for the solution. Fortunately, back during my Christmas break I did a visit to Casula Hobbies and whilst I was looking for other items, I stumbled across Ratio Swan Neck Kits (Ratio Kit 453) where at that moment I had a light bulb moment (pardon the Pun). This kit had the Lampshades that were a very similar match to the NSWGR Lampshades. From there, I decided to venture into scratch building the Platform Lights.
For the interest of not making this Blog post long and the fact that I did not take many photos of steps that I took to build the platform lights. I will not go into the full detail on how I constructed these lights for now. I have decided not to install LEDs for lighting as I do want to keep the electronics on this layout simple for now. However, as I did use brass tubing for the main bracket of the Lamp mounting which should allow for fine wiring to be fed through to power up a LED. I do want to experiment in building one up and wire it up to be lit up. Topic worthy for its own future Blog with the aim to have step by steps details provided.


Above Pictures summarises the steps of construction
For the Telegraph Poles, I used that Uneek models Telegraph pole kits for the stand alone light poles that are based on each side of the platform. For the larger telegraph pole located next to the Station Building, I used Kerroby Models Telegraph pole with a modified Telegraph pole Cross Arm that was also from Kerroby Models. Lamps and Telegraph Pole Cross Arms were super glued into their respective position.
Bottom Power Pole Cross Arm as supplied by Kerroby Models, the top Power Pole Cross Arm modified for getting the look to what was back in the day

Modified Cross Arms just after they are super glued on the Telegraph Pole


Base of each Telegraph Pole Painted back on the Base and Station Lamps Super Glued onto the Lamp Posts. Telegraph Poles completed.
Before I go into summarising the activities for the platform items. Some of you may have observed something wrong with the scales in my previous pictures where it has appeared in. Basically, I assembled it incorrectly, and yes it was a bit of rush job and was only meant to be a temporary setup until I worked out to model one that is closest to the version that was once based at Narellan. This set of scales was planned to go over to my eventual Tumbarumba home layout. Learning here is, never assume and model when you are almost falling asleep. It was a good wake up call, but thankfully something I can pull apart and start over again.

Scales that I constructed incorrectly
Scale and Station Seating are the only items that will needed for the platform, as well as some people which I will add in over time.

Modified Version of Scale and the Platform seat
Again, I will not go into the fine detail on how I built up both the Seating and the scales, but will touch a little bit on the Scales.
The Scales are another Uneek Models kit, where there are 2 sets of scales supplied. At my second attempt, I cut off the base section of the plate of the scales to get the look of the original scales.

Completed scales with a little bit of rust dusting on the plate of the scales

Station Seating painted and dull coated
Line Side Items
Line side items consisted of the Rodding for the Ground Throws. Typical debris such as dumped old sleepers.


Outhouse has been put into its final position and has been surrounded into the undergrowth.

Signal Leavers and Signal Diagram board fixed into positioned

Removed Sleepers and track put into place with static grass applied after their placement


Rodding for Ground Throws Completed

Office Hut for the Coal Stage and Coal Stage fixed into place


Down Pipes constructed and fixed to the station building
Narellan Completed
Finally, it is good to say that Narellan is at the point of completion. I will be adding people in the scene but will be doing that closer to the first public showing. I will be working on getting Narrellan out to a few exhibitions this year.

Next action on me now is to get the fleet of Locomotives and rolling stock sorted out.

Front Facias for the layout installed. Layout completed.
Next action on me now is to get the fleet of Locomotives and rolling stock sorted out.
Your ground throws, lamps, and the whole vibe of the Narellan layout looks very impressive Peter. I will look forward to seeing it on the exhibition scene in due course.
ReplyDeleteThank you Rob for the feedback. Hoping to get Narellan out to a few exhibitions this year.
DeleteNice work Peter! The station is particularly impressive. I'm sure there'll be plenty of folks eager to see a new layout exhibited down your way. What an exciting year ahead for you!
ReplyDeleteThanks Phil for the kind words. Hoping to make the first of the exhibition notices soon.
DeleteGood work Peter, looks great!
ReplyDeleteRay P
Thanks Ray
Delete