With no more Exhibitions for 2019, this means now that I will be fully committed in completing Narellan for it to be ready to hopefully appear at some Model Rail Exhibition for 2020.
It has been just around a year ago since I started construction of this layout and if it was not for all of the distraction that I had to deal with throughout the second part of this year, Im sure I would have had Narellan completed a few months ago. However, whilst I expect a bit of quiet time over the Christmas Break, Im hopeful to get Narellan completed. After that, the only items remaining is to get more Locomotives and Rolling stock prepared to ensure that there is a good reflection of the various trains that ran on the Camden Branch line. This will mean completing DCC Sound installations into Austrains 30 Class and IDR Models 70 Class locomotives. Weathering of the Locomotives and rolling stock. I also have some rolling stock kits to build, paint and weather.
Good thing is at this point of time I have a bear minimum fleet of Locomotives and Rolling Stock that are ready to run in the worst case.
Second and Final Attempt In Weathering the Office Hut
To close out one of my final line Side Structure Build, I stumble across a good colour Photo that was recently posted on one of the Facebook Groups that I follow of Narellan with the sun light beaming on the Office Hut that was next to the coal stage. Basically, whatever colour it was painted with, it was well disclosed under the dust.
This time round, I ended up using Tamiya Weathering Master powder which I found very effective in getting the desired result that I was after.


Landscaping Almost Completed
After being discharged from Hospital last month, the Doctor ordered that I was not to lift anything heavy up until Christmas, which meant I could not setup Narellan and finish off a few items on the layout to make it a bit more stable and add on a facia on the Pigeon box to make it a more presentable.

When I had got my energy back, I decided to start woking on the area where the coal stage will be based. I looking a several photos, I decided to make piles of coal along the line side. I was recently given some good Blue Foam which was easy to cut into shape to form a shape of a pile of coal. I ended up doing about 4 piles.

I then placed plaster cloth over the foam. And when the plaster cloth was set, I painted it and the surrounding area with black paint so that if there is any gaps in the once the coal was scattered it would not be that obvious.


Once the paint was dried, I brushed on some PVA glue (not watered down) and sprinkled coal on the area and just patted down the coal just to ensure if adhered to the glue. It is worth noting that from earlier experience with landscaping with coal, it is better to use non water down PVA Glue (or PVA glue straight from the bottle).


It has been just around a year ago since I started construction of this layout and if it was not for all of the distraction that I had to deal with throughout the second part of this year, Im sure I would have had Narellan completed a few months ago. However, whilst I expect a bit of quiet time over the Christmas Break, Im hopeful to get Narellan completed. After that, the only items remaining is to get more Locomotives and Rolling stock prepared to ensure that there is a good reflection of the various trains that ran on the Camden Branch line. This will mean completing DCC Sound installations into Austrains 30 Class and IDR Models 70 Class locomotives. Weathering of the Locomotives and rolling stock. I also have some rolling stock kits to build, paint and weather.
Good thing is at this point of time I have a bear minimum fleet of Locomotives and Rolling Stock that are ready to run in the worst case.
Second and Final Attempt In Weathering the Office Hut
To close out one of my final line Side Structure Build, I stumble across a good colour Photo that was recently posted on one of the Facebook Groups that I follow of Narellan with the sun light beaming on the Office Hut that was next to the coal stage. Basically, whatever colour it was painted with, it was well disclosed under the dust.
This time round, I ended up using Tamiya Weathering Master powder which I found very effective in getting the desired result that I was after.


Office after been weathered by Tamiya Weathering powder
Landscaping Almost Completed
After being discharged from Hospital last month, the Doctor ordered that I was not to lift anything heavy up until Christmas, which meant I could not setup Narellan and finish off a few items on the layout to make it a bit more stable and add on a facia on the Pigeon box to make it a more presentable.

The bare area that is in need of Landscaping
When I had got my energy back, I decided to start woking on the area where the coal stage will be based. I looking a several photos, I decided to make piles of coal along the line side. I was recently given some good Blue Foam which was easy to cut into shape to form a shape of a pile of coal. I ended up doing about 4 piles.

Foam that has been carved out to make the piles of coal
I then placed plaster cloth over the foam. And when the plaster cloth was set, I painted it and the surrounding area with black paint so that if there is any gaps in the once the coal was scattered it would not be that obvious.
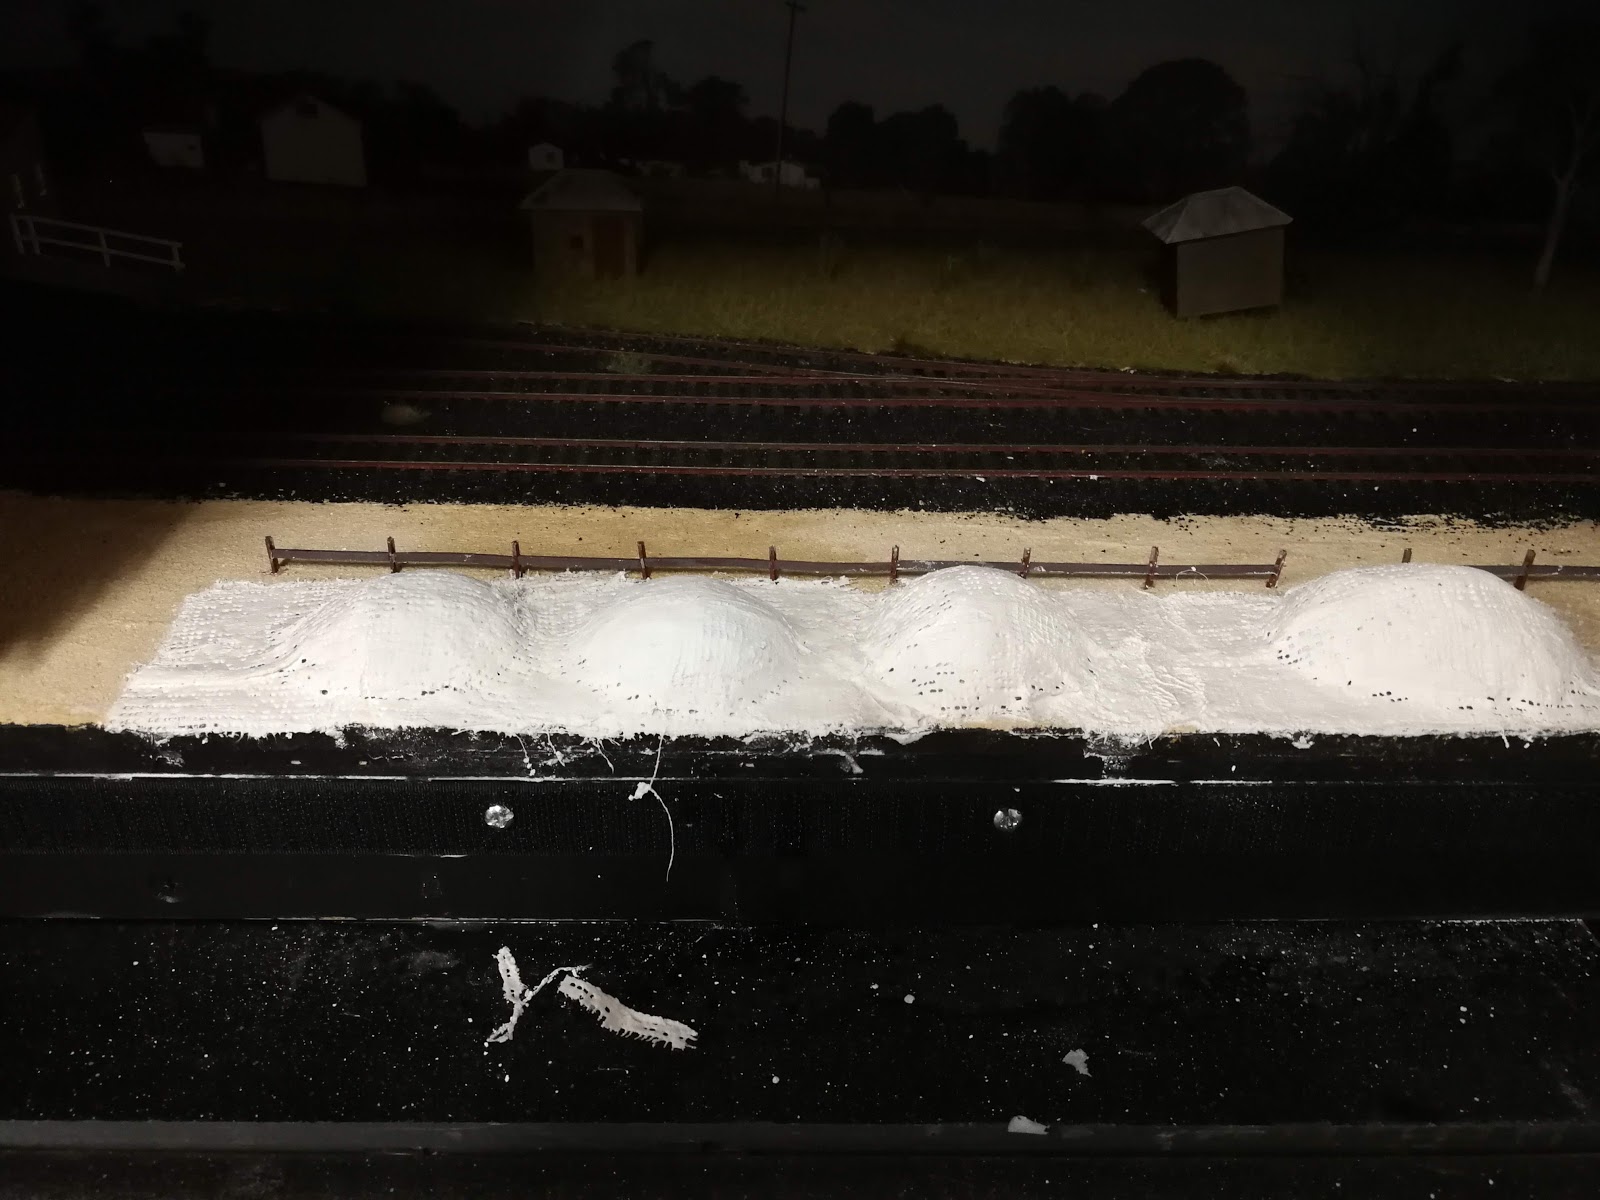
Plaster cloth soaked and left to set

Area where the coal is be placed painted black
Once the paint was dried, I brushed on some PVA glue (not watered down) and sprinkled coal on the area and just patted down the coal just to ensure if adhered to the glue. It is worth noting that from earlier experience with landscaping with coal, it is better to use non water down PVA Glue (or PVA glue straight from the bottle).

PVA Glue painted on the area of the black plaint where the coal is going be placed

Coal sprinkled on the PVA glue and left to set
After around 24 hours after applying the coal, I went over the area with a vacuum cleaner and was pleasantly surprised that the bulk of the coal remained stuck on the layout.
The final area that needed landscaping I planned to have more as a dirt patch. For this I simply did a mix of 50% water and 50% PVA glue with a drop of detergent, which I applied onto the area final bare area of the layout. Once that was applied, I got a cup of dirt with an old stocking to sprinkle the dirt onto the PVA glue. This is a different method to what was done with the coal. But what I do find with dirt, it absorbs the watered down PVA in which allows it to better set the dirt onto the base board.

After the dirt was applied to the layout
Ground Lever Throws
Before going into my experience in constructing the Andlan Models Ground Leaver Throws. This was a new method of railway modelling for me as this is the first time building up an etched kit. I tried constructing my first one by sticking it together with super glue. However, it ended in a disastrous result and by no means blaming the kit here, I knew that the first one of these type of kits was not going to be completed looking perfect. Basically I was applying a little bit too much pressure when I was super gluing the top of the ground frame and it collapsed in a heap.


Result of my first attempt. My advise solder this kit together rather than super gluing it.
However it ended up becoming a great learning experience where the second attempt I took the soldering method which I found to be not only easier to do than the super glue method, but I found that the model became way more robust via this method. In all, the bending into shape of the etched parts was mostly easy to do, just the the shaping of the top plate of the leaver frame was the slightly challenging part of this model. Rest is just taking your time to construct this model. The following Ground Throw was my second attempt which I think has so worked out well.


Above photos show the above shows the steps that where taken to build up the Ground Lever Throw.
Next steps from here it add on the styrene for the concrete slab platform and painting.
My Final Note For This Year
I would like to wish everyone a Merry Christmas and a safe Holiday Session.
I would like to thanks those who have provided me with the feedback wether it was via this blog page or in person over this last year.
I would like to thanks those who have provided me with the feedback wether it was via this blog page or in person over this last year.
I would also like to spare a thought to those who follow my post, as I know there are a few out Thirlmere Buxton way and other areas of NSW that may have been impacted by the Bushfire activity over the last few weeks as well as those that are out there on a daily basis fighting the fires. Ensure you all stay safe out there.
Merry Christmas Peter. Hope you stay safe over the holiday period and rest up following surgery, (small modeling projects only I fear). Keep up the good work!
ReplyDeleteIt may only be a small detail, but your ground throw lever frame needs to be positioned beyond the point (i.e. to the left of where it is in your picture). Looking forward to seeing the completed Narellan in person at some stage. Merry Christmas Peter.
ReplyDelete