Before I go into the Main Topic of of This Blog
It has again been a while since I have done a post as work for me has been extremely busy over the past few months. This has taken away a lot of my spare time that I would normally have. The small amount of time that I had available was spent in trying to get Wingello ready with the slight chance of making it to the Sydney Model Rail Exhibition at Liverpool which did not eventuate. But as fate has it, it was not a bad thing that Wingello did not make it to the Liverpool Show as it will give my Model Rail Club a lot of time to get Wingello right for the events that will come our way in 2019, in which all I can say is that it is going to be worth the wait.
I have also taken just a small break from the hobby (which one needs every now and then), but resumed a couple of weeks ago when a chunk of spare model rail time came way. This included getting some overdue attention to my Tumbarumba Project, which will be part of an upcoming blog.
Eitherway, back to the topic of Painting of Wingello Line side Structures, which I did send out a teaser picture from my last post.
Painting of the Models
I'm now in the final stages in completing the Wingello structures with the painting of the models.
It is worth mentioning, that my experience in painting models may go perfectly well in some instances but not so perfect in others. Yes, it can be painful experience where the paint job may need to be stripped back, prime and painted again. Even the more experienced Railway Modellers I do believe have these painful experiences frequently. However, it does all end well at some point.
Choices of Colour for Wingello
The members of my model rail club discussed the topic of colour throughout the project and we concluded that we wanted to paint the buildings similar to one of the previous colour schemes. We decided to go for a Ivory like colour for the main body of the structures with a green roof and White window frames.
After we tested out some colours, we decided to utilise the following colours:
Radome Tan (Model Masters Enamel) For main body of the Structures.
Green Zinc Chromate (Model Masters Enamel) For the Roofs of the Structures
Flat White (Model Masters Enamel) For the window frames
Leather (Model Masters Enamel) For the skirting, doors and door frames.
Applying the Paint
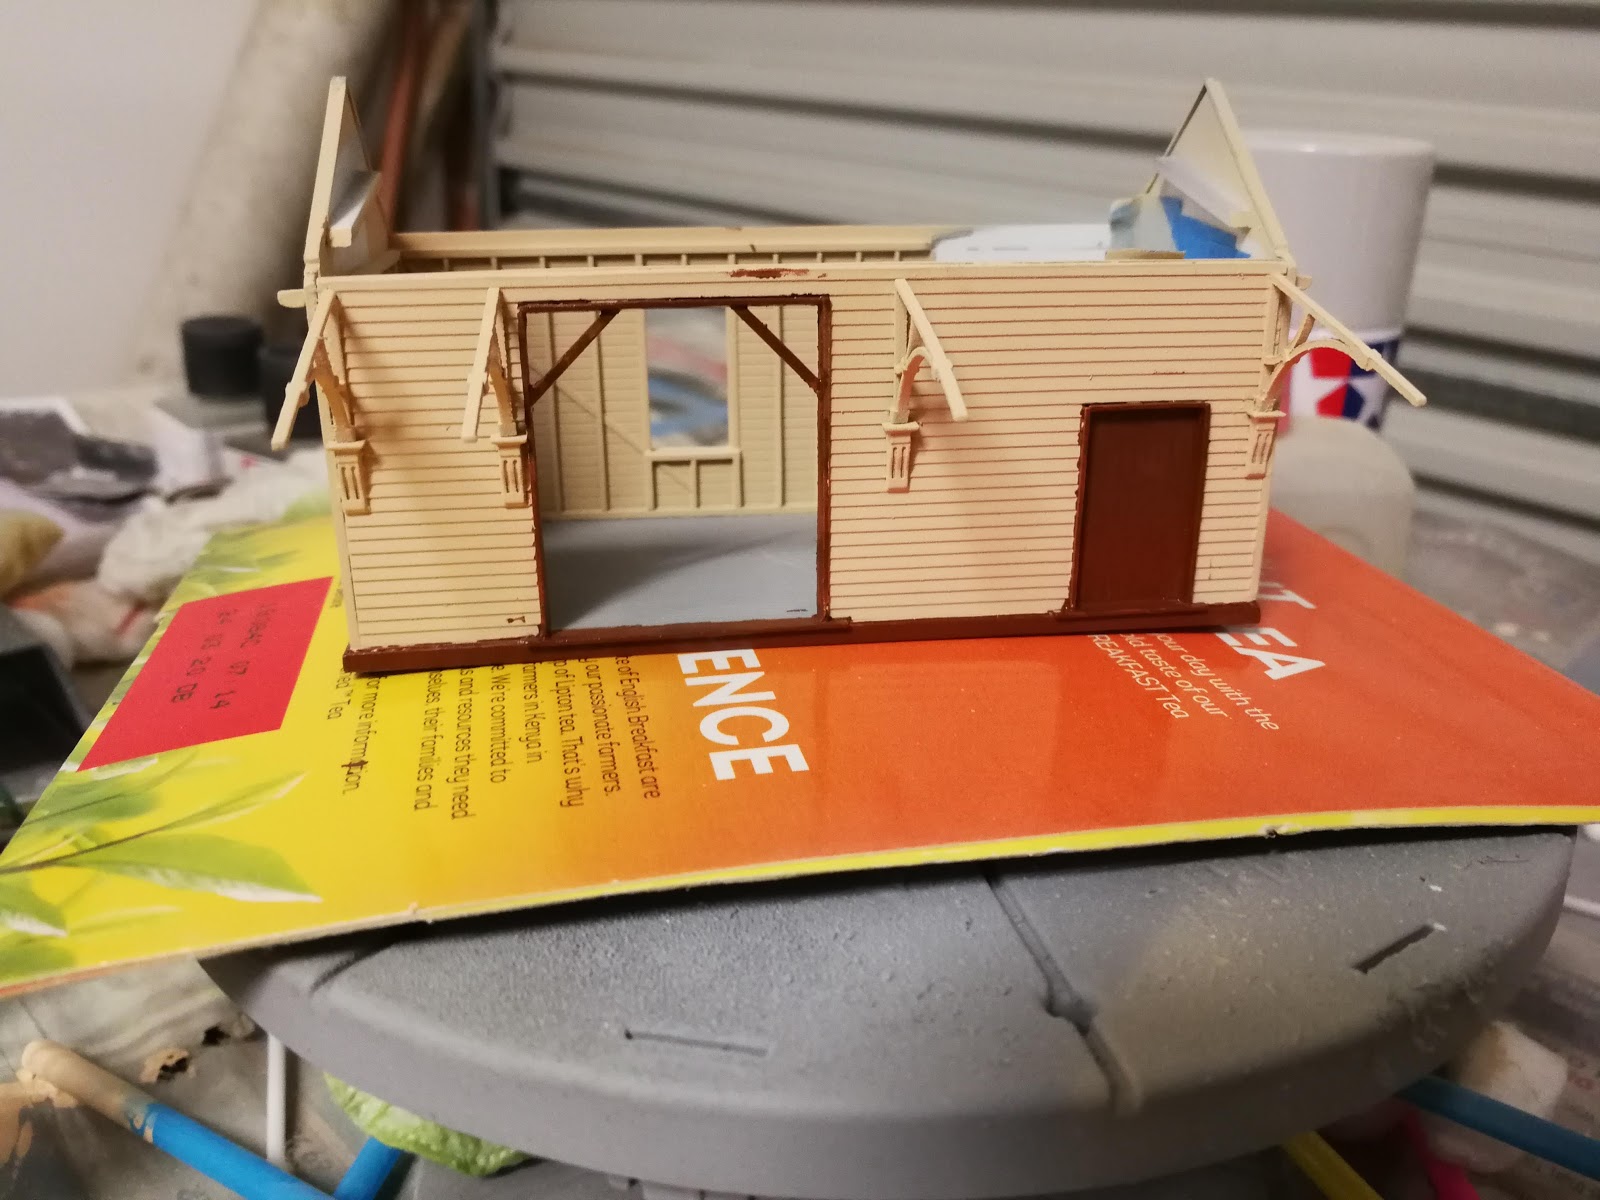
Preparing the model for painting is for me is one of the least favourite tasks, but necessary. Basically it involves removing grit or dust from the model. Then paint the model in Primer. Then mask up the areas of the model exposing the areas that you desire to paint in the desired colour. Wait for the paint to dry before moving onto the next colour that needs to be painted. Then repeat the process again for the next colour to be applied.
For this case, I will be using an airbrush to paint these structures.
Here are the pictures of my painting efforts.


It has again been a while since I have done a post as work for me has been extremely busy over the past few months. This has taken away a lot of my spare time that I would normally have. The small amount of time that I had available was spent in trying to get Wingello ready with the slight chance of making it to the Sydney Model Rail Exhibition at Liverpool which did not eventuate. But as fate has it, it was not a bad thing that Wingello did not make it to the Liverpool Show as it will give my Model Rail Club a lot of time to get Wingello right for the events that will come our way in 2019, in which all I can say is that it is going to be worth the wait.
I have also taken just a small break from the hobby (which one needs every now and then), but resumed a couple of weeks ago when a chunk of spare model rail time came way. This included getting some overdue attention to my Tumbarumba Project, which will be part of an upcoming blog.
Eitherway, back to the topic of Painting of Wingello Line side Structures, which I did send out a teaser picture from my last post.
Painting of the Models
I'm now in the final stages in completing the Wingello structures with the painting of the models.
It is worth mentioning, that my experience in painting models may go perfectly well in some instances but not so perfect in others. Yes, it can be painful experience where the paint job may need to be stripped back, prime and painted again. Even the more experienced Railway Modellers I do believe have these painful experiences frequently. However, it does all end well at some point.
Choices of Colour for Wingello
The members of my model rail club discussed the topic of colour throughout the project and we concluded that we wanted to paint the buildings similar to one of the previous colour schemes. We decided to go for a Ivory like colour for the main body of the structures with a green roof and White window frames.
After we tested out some colours, we decided to utilise the following colours:
Radome Tan (Model Masters Enamel) For main body of the Structures.
Green Zinc Chromate (Model Masters Enamel) For the Roofs of the Structures
Flat White (Model Masters Enamel) For the window frames
Leather (Model Masters Enamel) For the skirting, doors and door frames.
Applying the Paint
Preparing the model for painting is for me is one of the least favourite tasks, but necessary. Basically it involves removing grit or dust from the model. Then paint the model in Primer. Then mask up the areas of the model exposing the areas that you desire to paint in the desired colour. Wait for the paint to dry before moving onto the next colour that needs to be painted. Then repeat the process again for the next colour to be applied.
For this case, I will be using an airbrush to paint these structures.
Here are the pictures of my painting efforts.


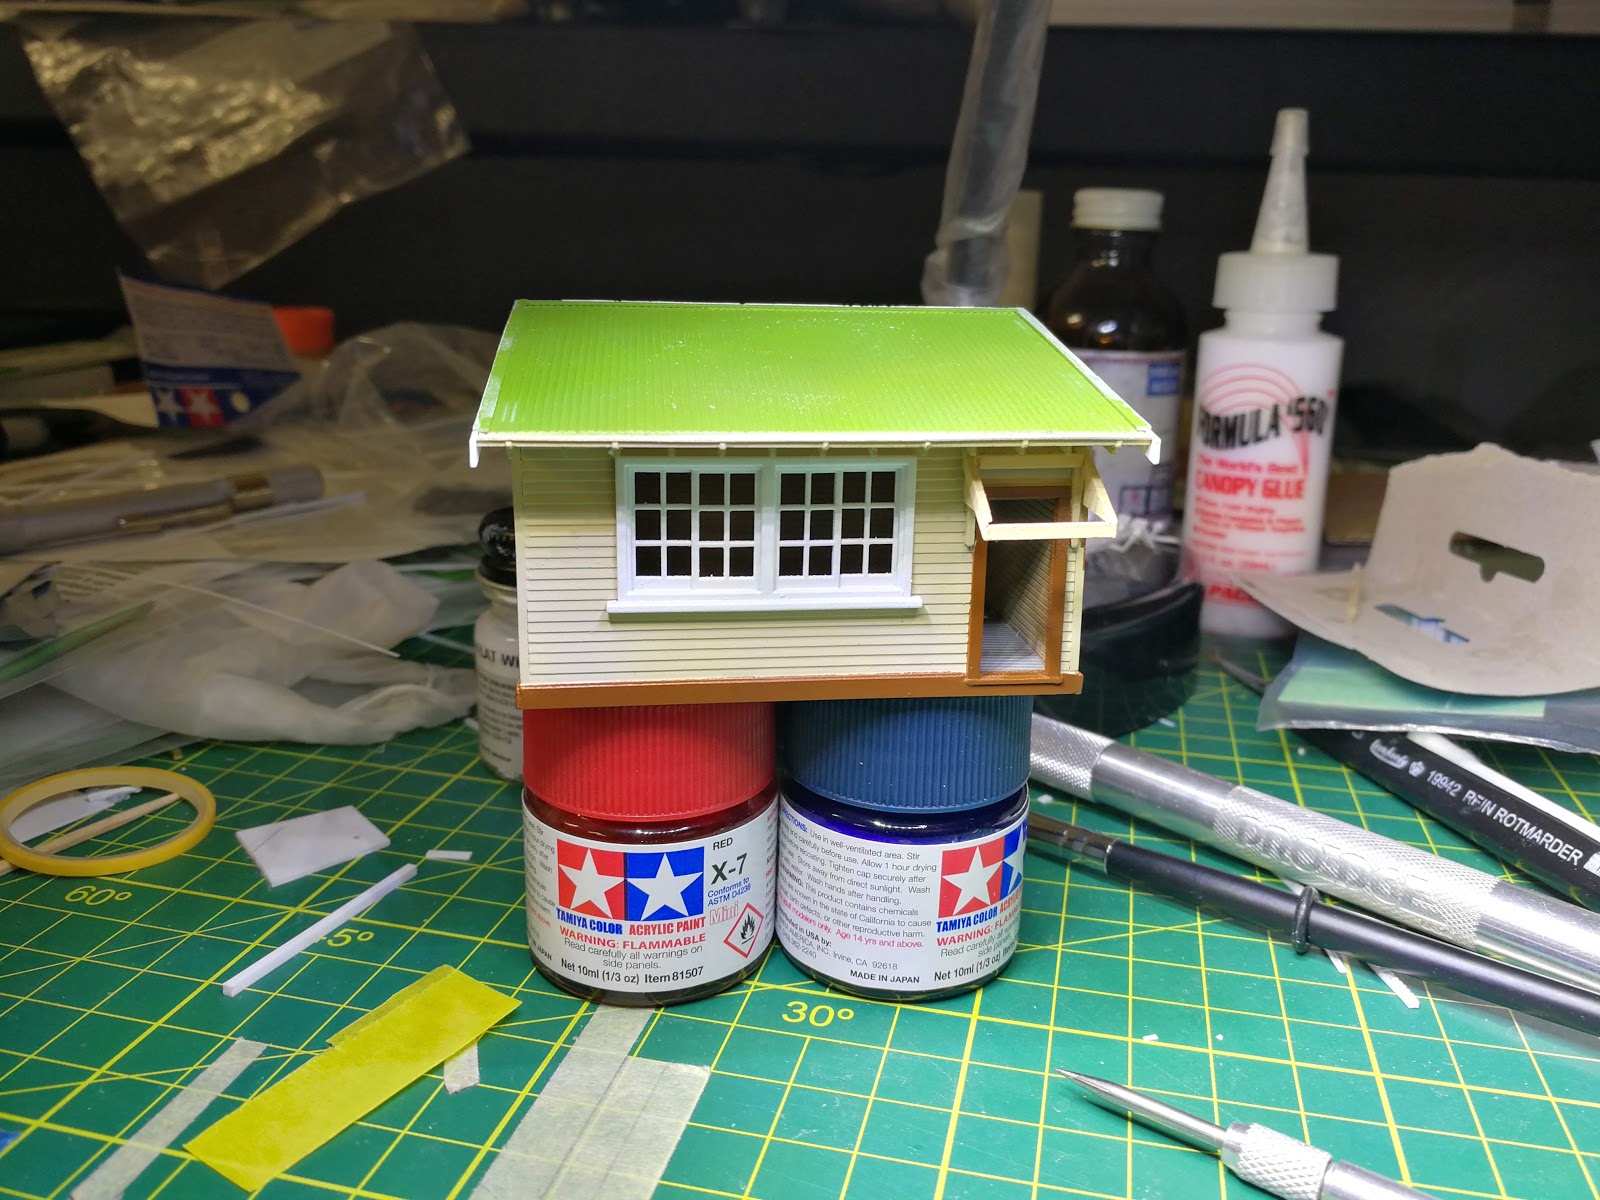


Basically, just a few areas that will need to receive a little touch up paint, but happy with the outcome. This was not done drama free, I did have to strip back a couple of my paint jobs and start from scratch, but persistence pays off in the end.
Peter,
ReplyDeleteThe persistence was worth it, very impressive work!
cheers Phil